Difference between revisions of "Using Spring Charts"
| (7 intermediate revisions by the same user not shown) | |||
| Line 1: | Line 1: | ||
| − | + | SE users have the function to use '''"Spring Charts"'''. These allow you to put in a couple (from 2 to 20) sets of bend angles vs. spring angles and the software will calculate and display the angles for a part. | |
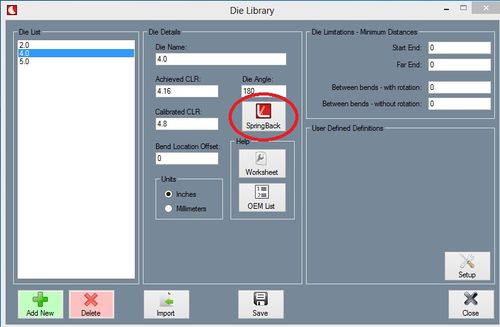
| − | To set up the Spring Charts, go to the "Die Library" window under your "Tools" pull down menu. Select "Spring Back" button near the | + | To set up the Spring Charts, go to the '''"Die Library"''' window under your '''"Tools"''' pull down menu. Select the '''"Spring Back"''' button near the bottom left corner of the window. |
[[File:SpringCharts1.jpg|500px|]] | [[File:SpringCharts1.jpg|500px|]] | ||
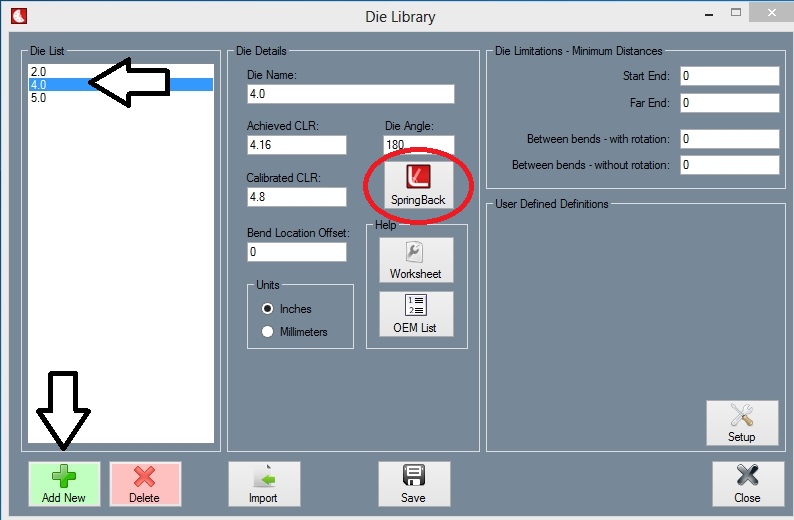
| − | Once you enter into the Spring Charts screen you will see everything is blank. Select a die from the list to add spring back values to and click the "Add" button from the chart in the center of the window. | + | Once you enter into the Spring Charts screen you will see everything is blank. Select a die from the list to add spring back values to and click the '''"Add New"''' button from the chart in the center of the window. |
| − | [[File: | + | [[File:SpringCharts5.jpg]] |
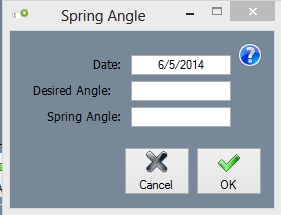
| − | Fill in the " | + | Fill in the '''"Desired Angle"''' and the '''"Spring Angle"'''. |
[[File:SpringCharts3.jpg]] | [[File:SpringCharts3.jpg]] | ||
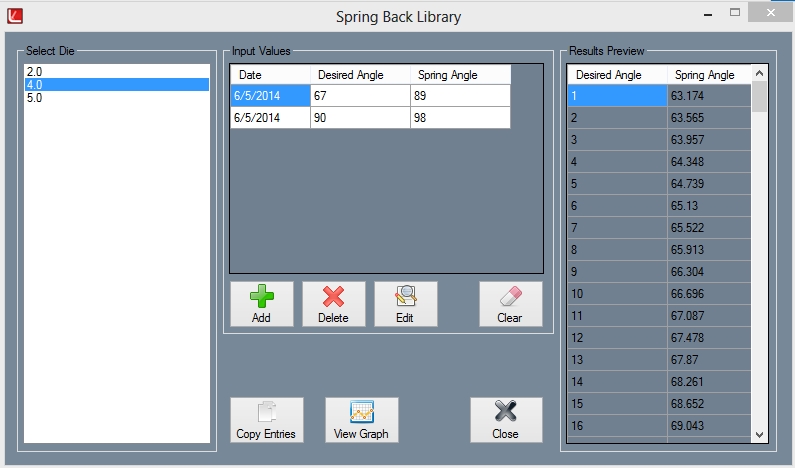
| − | Once you have filled in | + | Once you have filled in at least 2 sets of values the chart will fill in on the right side. |
[[File:SpringCharts4.jpg]] | [[File:SpringCharts4.jpg]] | ||
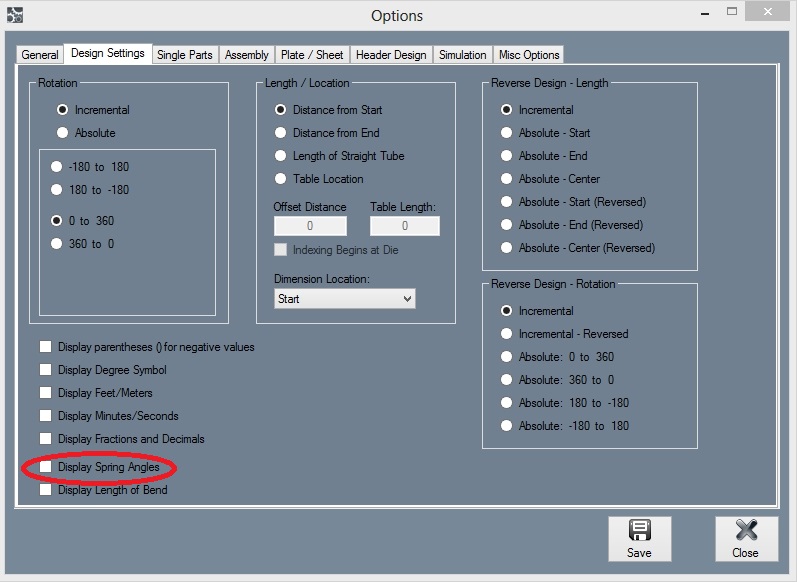
| − | When in a part, select the "Display Spring Angle" check box in your tooling tab. | + | When in a part, select the '''"Display Spring Angle"''' check box in your tooling tab. |
| − | [[File: | + | [[File:SpringCharts6.jpg]] |
Latest revision as of 07:39, 6 October 2015
SE users have the function to use "Spring Charts". These allow you to put in a couple (from 2 to 20) sets of bend angles vs. spring angles and the software will calculate and display the angles for a part.
To set up the Spring Charts, go to the "Die Library" window under your "Tools" pull down menu. Select the "Spring Back" button near the bottom left corner of the window.
Once you enter into the Spring Charts screen you will see everything is blank. Select a die from the list to add spring back values to and click the "Add New" button from the chart in the center of the window.
Fill in the "Desired Angle" and the "Spring Angle".
Once you have filled in at least 2 sets of values the chart will fill in on the right side.
When in a part, select the "Display Spring Angle" check box in your tooling tab.
