Difference between revisions of "Plate: Geometric Library"
| (15 intermediate revisions by the same user not shown) | |||
| Line 1: | Line 1: | ||
'''[[Main Page|Bend-Tech 7x Wiki]] :: [[Plate|Sheet Metal Module]] :: Tools :: Geometric Library''' | '''[[Main Page|Bend-Tech 7x Wiki]] :: [[Plate|Sheet Metal Module]] :: Tools :: Geometric Library''' | ||
__NOTOC__ | __NOTOC__ | ||
| − | [[File:Toolstab1 | + | =Geometric Library= |
| − | + | [[File:Toolstab1.png|right]] | |
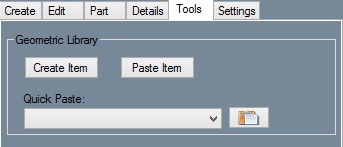
The "'''Geometric Library'''" located in the "'''Tools'''" section of the [[Plate|Sheet Metal Module]] Interface is a library specifically for user-defined entities like specialized holes, arcs, shapes, lines, etc. If users spend a lot of time on a design and would like to save sections of it to use in another design, they can simply select the items from the display area and save them to this Geometric Library. From there, the items can be altered and re-entered into another "'''Plate/Sheet Metal'''" design. | The "'''Geometric Library'''" located in the "'''Tools'''" section of the [[Plate|Sheet Metal Module]] Interface is a library specifically for user-defined entities like specialized holes, arcs, shapes, lines, etc. If users spend a lot of time on a design and would like to save sections of it to use in another design, they can simply select the items from the display area and save them to this Geometric Library. From there, the items can be altered and re-entered into another "'''Plate/Sheet Metal'''" design. | ||
| + | |||
| + | [[File:geo_lib1.png]] | ||
| + | |||
| + | ==Available Items== | ||
| + | [[File:geo_lib_available1.png|right]] | ||
| + | |||
| + | *'''Available Items:''' This list is where all the user's saved items are held for later use. | ||
| + | |||
| + | *To place items or entities into the "'''Available Items:'''" list, users first have to select the "'''Create Item:'''" [[File:create_item_lib1.png]] button under the "'''Tools:'''" tab and select the items or entities from the design in the display area. Once they are selected, the user must select the "'''Complete:'''" button, click within the display area once more and a window will appear prompting the user to name the item(s) and provide any necessary notes that should be applied to the item(s). When this step is complete, the item(s) will be saved to the "'''Available Items:'''" list until the user chooses to delete it. | ||
| + | |||
| + | ::[[File:geo_lib_save1.png]] | ||
| + | |||
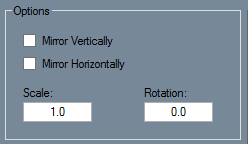
| + | ==Options== | ||
| + | [[File:geo_lib_options1.png|right]] | ||
| + | |||
| + | *'''Mirror Vertically:''' Check the "'''Mirror Vertically:'''" checkbox to flip the item vertically before pasting it into the design. | ||
| + | |||
| + | *'''Mirror Horizontally:''' Check the "'''Mirror Horizontally:'''" checkbox to flip the item horizontally before pasting it into the design. | ||
| + | |||
| + | *'''Scale:''' Enter a number higher than '''1''' into the "'''Scale:'''" value field in order to enlarge the item by that percentage. A decimal number less than '''1''' will shrink the size of the item to that percentage. (Example: If the user desires their item to be 3 times smaller than the default (1), they must enter '''.25''' into the value field.) | ||
| + | |||
| + | *'''Rotation:''' Enter a number between (0-360) into the "'''Rotation:'''" value field in order to rotate the item before pasting it into the design. | ||
| + | |||
| + | ==Properties== | ||
| + | [[File:geo_lib_properties1.png|right]] | ||
| + | |||
| + | *'''Item Bounds:''' The "'''Item Bounds:''' field shows the vertical and horizontal dimensions of the selected item. | ||
| + | |||
| + | *'''Notes:''' Users can enter information about the selected item in the "'''Notes:'''" section. | ||
| + | |||
| + | |||
| + | |||
| + | |||
| + | |||
| + | |||
| + | |||
| + | |||
| + | ==Additional Commands== | ||
| + | |||
| + | *'''Refresh:''' Select the "'''Refresh:'''" [[File:refresh_lib1.png]] button to refresh the information entered into any of the value fields, etc. | ||
| + | |||
| + | *'''Delete:''' Select the "'''Delete:'''" [[File:delete_lib1.png]] button to delete items selected from the Available Items list. | ||
| + | |||
| + | *'''Cancel:''' Select the "'''Cancel:'''" [[File:cancel_lib1.png]] button to close the window. | ||
| + | |||
| + | *'''Paste:''' Select the "'''Paste:'''" [[File:paste_lib1.png]] button to paste the selected item. The window will close and the item can be placed into the display area. | ||
Latest revision as of 12:55, 6 January 2015
Bend-Tech 7x Wiki :: Sheet Metal Module :: Tools :: Geometric Library
Geometric Library
The "Geometric Library" located in the "Tools" section of the Sheet Metal Module Interface is a library specifically for user-defined entities like specialized holes, arcs, shapes, lines, etc. If users spend a lot of time on a design and would like to save sections of it to use in another design, they can simply select the items from the display area and save them to this Geometric Library. From there, the items can be altered and re-entered into another "Plate/Sheet Metal" design.
Available Items
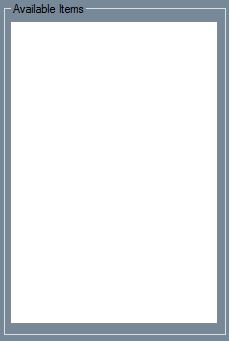
- Available Items: This list is where all the user's saved items are held for later use.
- To place items or entities into the "Available Items:" list, users first have to select the "Create Item:"
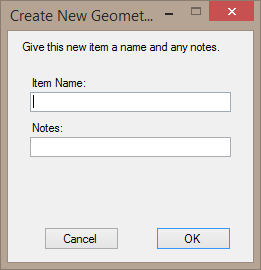
 button under the "Tools:" tab and select the items or entities from the design in the display area. Once they are selected, the user must select the "Complete:" button, click within the display area once more and a window will appear prompting the user to name the item(s) and provide any necessary notes that should be applied to the item(s). When this step is complete, the item(s) will be saved to the "Available Items:" list until the user chooses to delete it.
Options
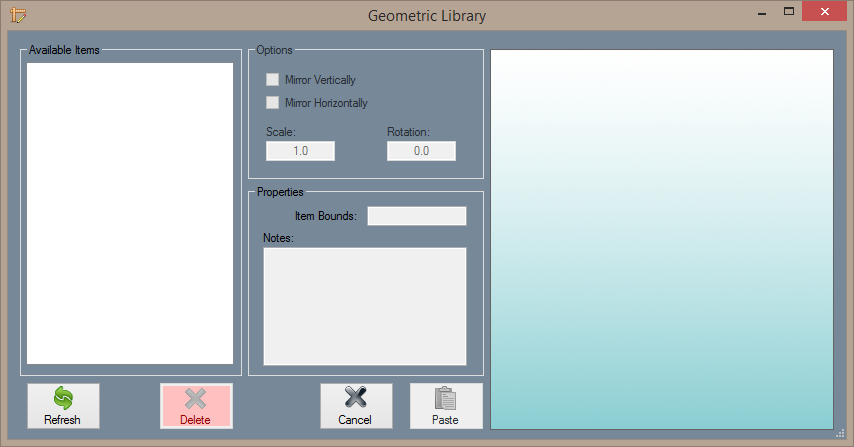
- Mirror Vertically: Check the "Mirror Vertically:" checkbox to flip the item vertically before pasting it into the design.
- Mirror Horizontally: Check the "Mirror Horizontally:" checkbox to flip the item horizontally before pasting it into the design.
- Scale: Enter a number higher than 1 into the "Scale:" value field in order to enlarge the item by that percentage. A decimal number less than 1 will shrink the size of the item to that percentage. (Example: If the user desires their item to be 3 times smaller than the default (1), they must enter .25 into the value field.)
- Rotation: Enter a number between (0-360) into the "Rotation:" value field in order to rotate the item before pasting it into the design.
Properties
- Item Bounds: The "Item Bounds: field shows the vertical and horizontal dimensions of the selected item.
- Notes: Users can enter information about the selected item in the "Notes:" section.
