Difference between revisions of "PickPoints - 2 Points"
| Line 6: | Line 6: | ||
'''Step 2:''' Select the "'''Set Reference'''" command button under '''Two Points'''. | '''Step 2:''' Select the "'''Set Reference'''" command button under '''Two Points'''. | ||
| − | '''Step 3:''' ''' | + | '''Step 3:''' Select a '''"PickPoint"''' for the start end of the line. Note: The distance value will be determined from this end. |
| − | '''Step 4:''' ''' | + | '''Step 4:''' Select the 2nd '''"PickPoint"''' representing the line. |
'''Step 5:''' Enter the value into the "'''Move Amount'''" field. You will see a Purple point at this location. | '''Step 5:''' Enter the value into the "'''Move Amount'''" field. You will see a Purple point at this location. | ||
Latest revision as of 07:52, 30 September 2015
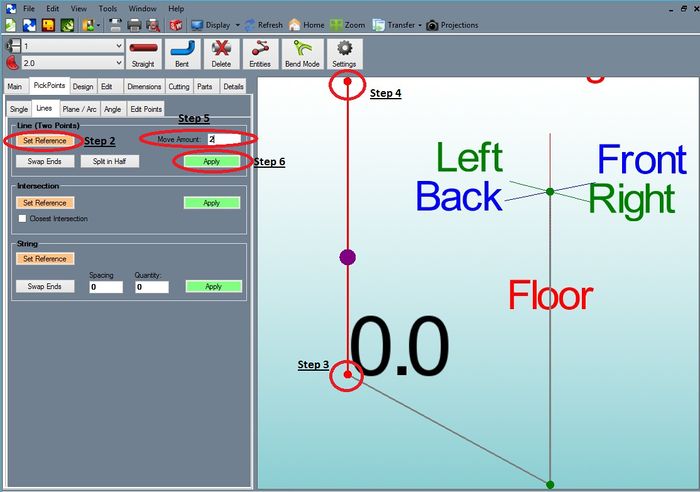
The PickPoint - 2 Points method allows for a point to be located "x" number of millimeters or inches down a line.
Step 1: Select the "PickPoints" tab, then the "Reference" tab.
Step 2: Select the "Set Reference" command button under Two Points.
Step 3: Select a "PickPoint" for the start end of the line. Note: The distance value will be determined from this end.
Step 4: Select the 2nd "PickPoint" representing the line.
Step 5: Enter the value into the "Move Amount" field. You will see a Purple point at this location.
Step 6: Select the "Apply" command.
