Difference between revisions of "Cutting the End of a Part"
(Created page with "The following are the steps to setting up the cutting the end of a "part" . Step 1) Select the "Cutting" tab. Step 2) Select the "New Cut" command button. Step 3) Select th...") |
|||
| (3 intermediate revisions by the same user not shown) | |||
| Line 1: | Line 1: | ||
The following are the steps to setting up the cutting the end of a "part" . | The following are the steps to setting up the cutting the end of a "part" . | ||
| − | Step 1 | + | '''Step 1:''' Select the '''"Cutting"''' tab. |
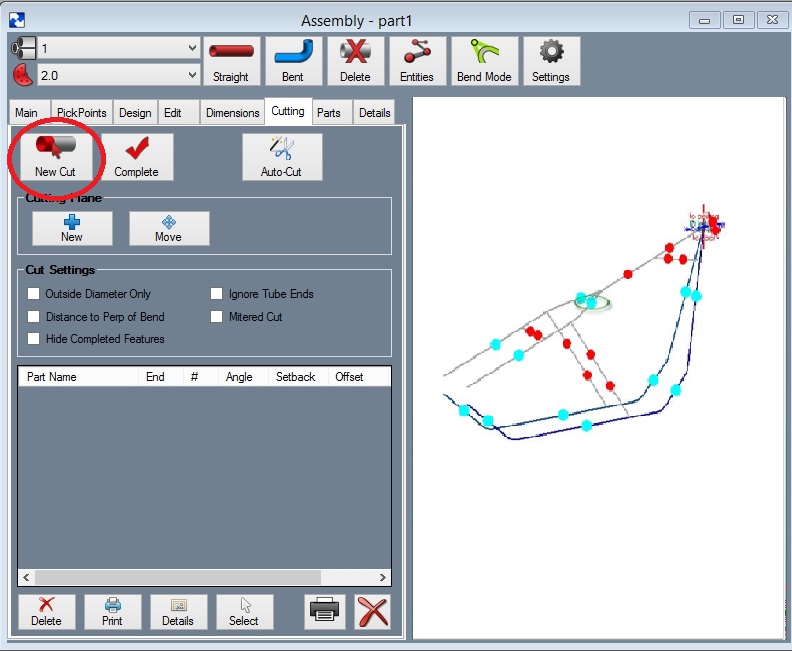
| − | Step 2 | + | '''Step 2:''' Select the '''"New Cut"''' command button. |
| − | Step 3 | + | '''Step 3:''' Select the tube you are going to cut. Note: The straight end of a bent part will have a blue PickPoint on it. Select this PickPoint. You will find our part turn green in color. |
| − | CutEnd1. | + | [[File:CutEnd1.jpg]] |
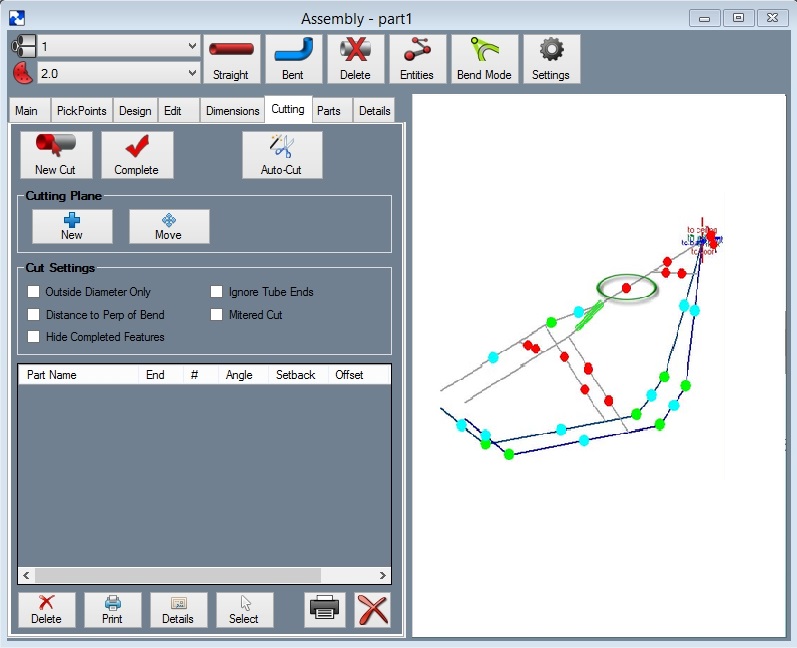
| − | Step 4 | + | '''Step 4:''' Select the dot(s) representing the tube section(s) that our part is going to be cut to. You will find the intersecting tubes will turn red. |
| − | CutEnd2. | + | [[File:CutEnd2.jpg]] |
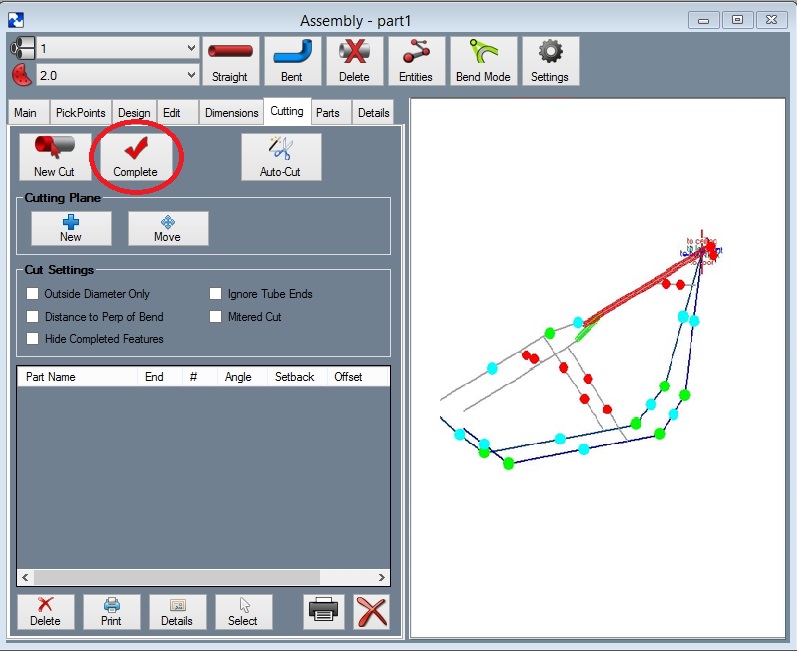
| − | Step 5 | + | '''Step 5:''' Select the '''"Cut Complete"''' command button. |
| − | CutEnd3. | + | [[File:CutEnd3.jpg]] |
Notice the intersection now has a black and a blue cut marks showing the inside and outside of the material where each meets the intersection part(s). | Notice the intersection now has a black and a blue cut marks showing the inside and outside of the material where each meets the intersection part(s). | ||
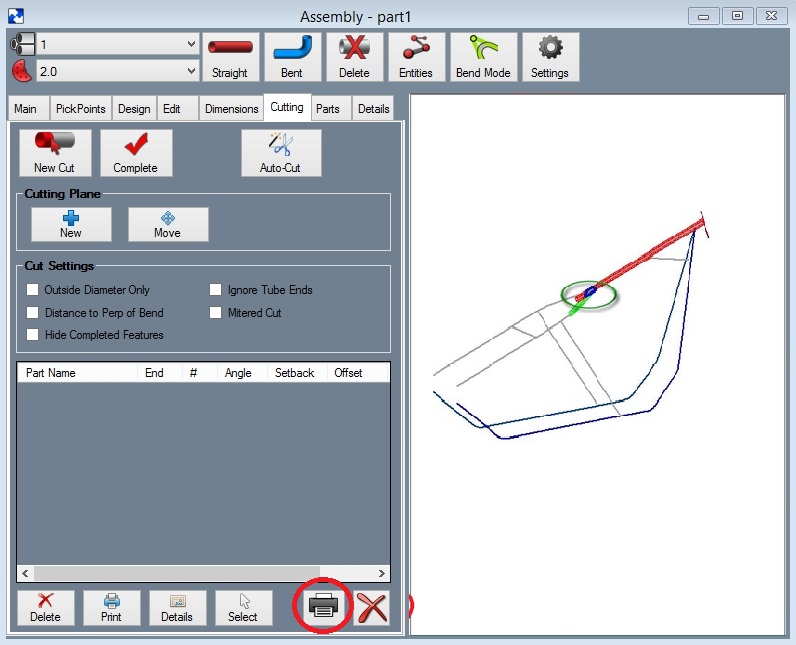
| − | Step 6 | + | '''Step 6:''' Select the '''"Print"''' command button. |
| − | CutEnd4. | + | [[File:CutEnd4.jpg]] |
The cutting templates can be called up at a later time by selecting them from the list shown. | The cutting templates can be called up at a later time by selecting them from the list shown. | ||
Latest revision as of 13:42, 5 October 2015
The following are the steps to setting up the cutting the end of a "part" .
Step 1: Select the "Cutting" tab.
Step 2: Select the "New Cut" command button.
Step 3: Select the tube you are going to cut. Note: The straight end of a bent part will have a blue PickPoint on it. Select this PickPoint. You will find our part turn green in color.
Step 4: Select the dot(s) representing the tube section(s) that our part is going to be cut to. You will find the intersecting tubes will turn red.
Step 5: Select the "Cut Complete" command button.
Notice the intersection now has a black and a blue cut marks showing the inside and outside of the material where each meets the intersection part(s).
Step 6: Select the "Print" command button.
The cutting templates can be called up at a later time by selecting them from the list shown.


