Difference between revisions of "Create a Bent Part"
| (5 intermediate revisions by the same user not shown) | |||
| Line 2: | Line 2: | ||
This thread will show how to create a "Bend Part" (a part with bends) in the assembly interface. | This thread will show how to create a "Bend Part" (a part with bends) in the assembly interface. | ||
| − | Please review the following thread | + | Please review the following thread [http://www.bend-tech.com/wiki7/index.php?title=Assembly#Bent Here]. |
| − | http://www. | ||
| − | |||
| − | + | '''Step 1:''' Select the command button "Bent Part" | |
| − | |||
| − | |||
| − | |||
| − | |||
| − | Step 1 | ||
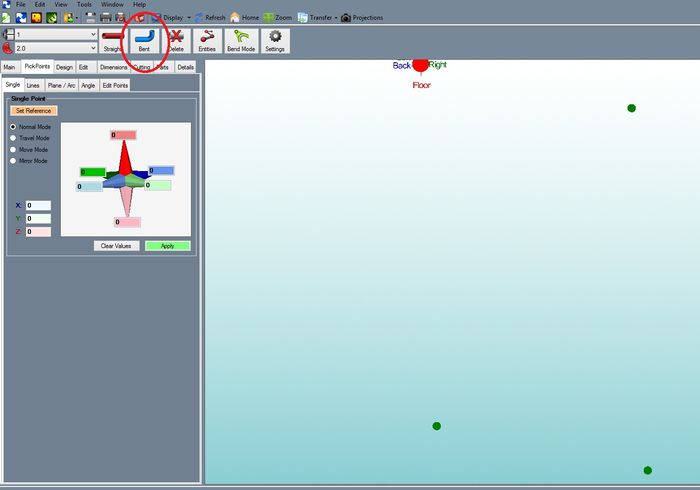
[[File:Bent1.jpg|700px]] | [[File:Bent1.jpg|700px]] | ||
| − | Step 2 | + | '''Step 2:''' Enter the number of bends and "OK" to continue. |
[[File:Bent2.jpg]] | [[File:Bent2.jpg]] | ||
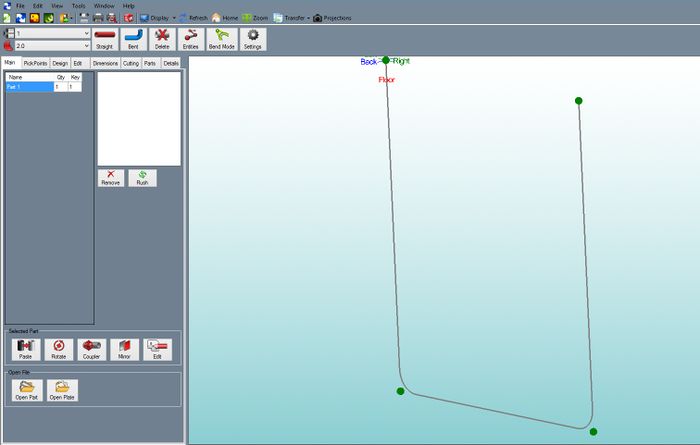
| − | Step 3 | + | '''Step 3:''' Select the first "PickPoint" of the part. This is one end of the part. The part creation is now tied to the cursor. |
| − | Step 4 | + | '''Step 4:''' Select the "PickPoint" for the apex of 1st bend. |
| − | Step 5 | + | '''Step 5:''' Select the "PickPoint"s for any additional bends in the part. Pick these in order. |
| − | Step 6 | + | '''Step 6:''' Select the "PickPoint" for the end of the part. |
[[file:Bent3.jpg|700px|]] | [[file:Bent3.jpg|700px|]] | ||
| − | Step 7 | + | '''Step 7:''' Enter in a "Part Name". Select "OK" to continue |
[[File:Bent4.jpg]] | [[File:Bent4.jpg]] | ||
| Line 40: | Line 33: | ||
Notice how Bend-Tech will update the part with the material and tooling that is selected. The PickPoints for the part features are automatically generated. | Notice how Bend-Tech will update the part with the material and tooling that is selected. The PickPoints for the part features are automatically generated. | ||
| − | [[ | + | [[File:Bent5.jpg|700px|]] |
Latest revision as of 13:35, 28 September 2016
This thread will show how to create a "Bend Part" (a part with bends) in the assembly interface.
Please review the following thread Here.
Step 1: Select the command button "Bent Part"
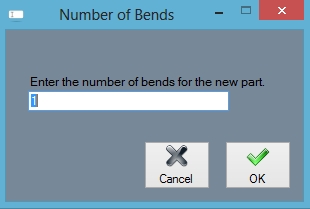
Step 2: Enter the number of bends and "OK" to continue.
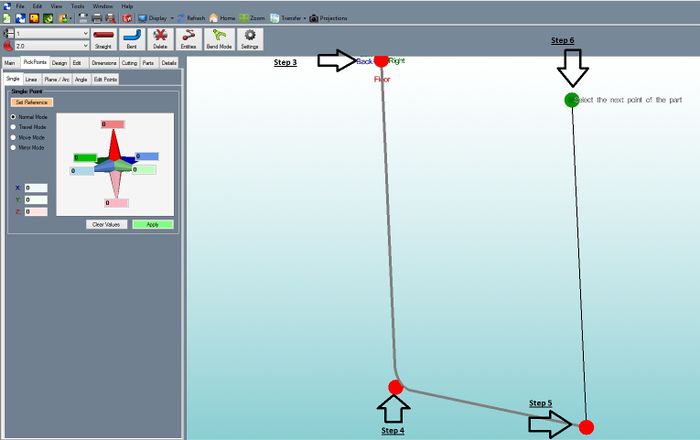
Step 3: Select the first "PickPoint" of the part. This is one end of the part. The part creation is now tied to the cursor.
Step 4: Select the "PickPoint" for the apex of 1st bend.
Step 5: Select the "PickPoint"s for any additional bends in the part. Pick these in order.
Step 6: Select the "PickPoint" for the end of the part.
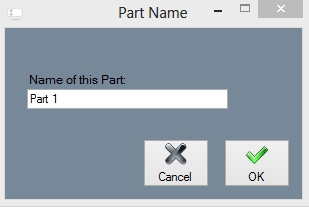
Step 7: Enter in a "Part Name". Select "OK" to continue
Notice how Bend-Tech will update the part with the material and tooling that is selected. The PickPoints for the part features are automatically generated.
