Difference between revisions of "Exporting a DXF File"
| Line 3: | Line 3: | ||
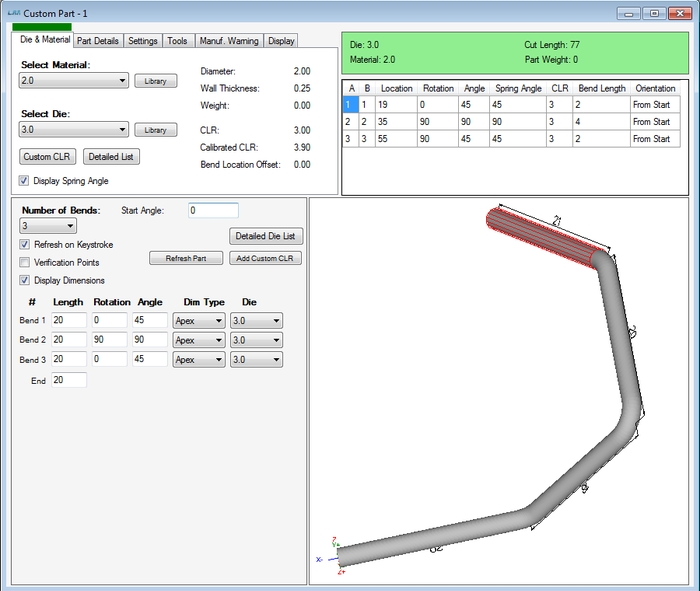
1) Select '''"File", "New", "Tube"''', and click on '''"Custom Part"'''. Then enter the following values to create our part. | 1) Select '''"File", "New", "Tube"''', and click on '''"Custom Part"'''. Then enter the following values to create our part. | ||
| − | Export1. | + | [[File:Export1.jpg]] |
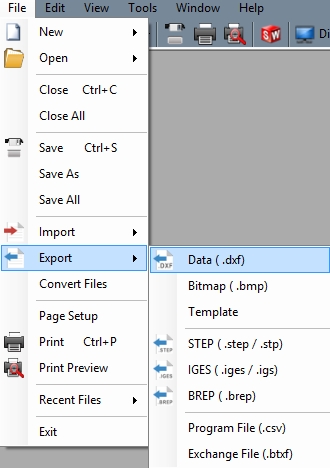
2) Select '''"File", "Export", "Data (dxf)"'''. | 2) Select '''"File", "Export", "Data (dxf)"'''. | ||
| − | Export2. | + | [[File:Export2.jpg]] |
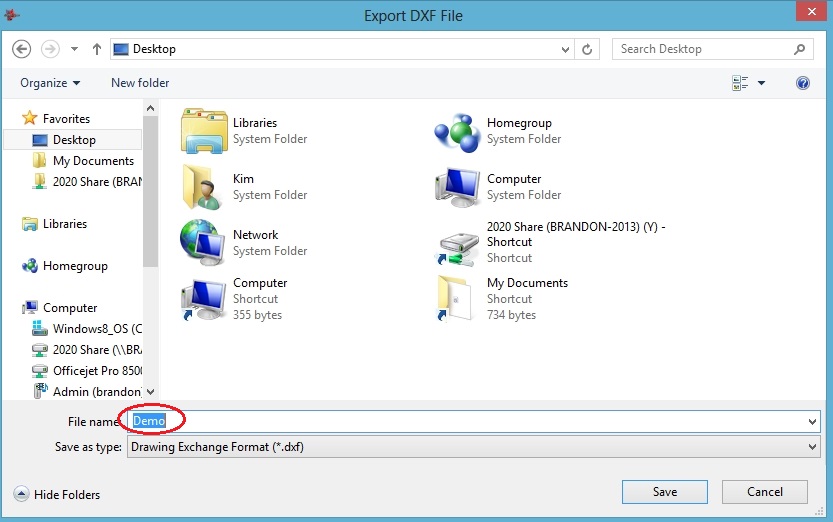
3) The "create dxf file" window will appear allowing you pick a location on your computer to save the dxf file. We will call this file "demo.dxf". | 3) The "create dxf file" window will appear allowing you pick a location on your computer to save the dxf file. We will call this file "demo.dxf". | ||
| − | Export3. | + | [[File:Export3.jpg]] |
4) Click '''"Save"''' and your dxf file will be saved in the location you specified. | 4) Click '''"Save"''' and your dxf file will be saved in the location you specified. | ||
Latest revision as of 13:45, 9 June 2014
In this thread, we will show you how to export a part to a .dxf file, which can be used by AutoCAD software.
1) Select "File", "New", "Tube", and click on "Custom Part". Then enter the following values to create our part.
2) Select "File", "Export", "Data (dxf)".
3) The "create dxf file" window will appear allowing you pick a location on your computer to save the dxf file. We will call this file "demo.dxf".
4) Click "Save" and your dxf file will be saved in the location you specified.


