Difference between revisions of "XYZ Example 3 (Over 90 Degree Bends)"
| Line 7: | Line 7: | ||
1) Zero out the '''"Start"''' row to make our start point the center of the locator. | 1) Zero out the '''"Start"''' row to make our start point the center of the locator. | ||
| − | + | [[:FileXYZex3.1.jpg]] | |
2) In the '''"Bend 1"''' row enter '''"12"''' for '''"X"''', and '''"0"''' for both '''"Y" and "Z"'''. - This will give us 12" from the start of the tube, to the apex of the bend. | 2) In the '''"Bend 1"''' row enter '''"12"''' for '''"X"''', and '''"0"''' for both '''"Y" and "Z"'''. - This will give us 12" from the start of the tube, to the apex of the bend. | ||
| − | XYZex3.2. | + | [[File:XYZex3.2.jpg]] |
3) In the''' "End"''' row enter '''"2"''' for '''"X"''',''' "10"''' for '''"Y"''', and '''"0"''' for '''"Z"'''. - From the apex of the bend, this will put our third point -10 back up the X axis and +10 down the Y axis. | 3) In the''' "End"''' row enter '''"2"''' for '''"X"''',''' "10"''' for '''"Y"''', and '''"0"''' for '''"Z"'''. - From the apex of the bend, this will put our third point -10 back up the X axis and +10 down the Y axis. | ||
| − | XYZex3.3. | + | [[File:XYZex3.3.jpg]] |
Revision as of 14:49, 9 June 2014
In this example, we will show you how to create a closed "L" bracket.
NOTE: All XYZ locations are based upon a 0,0,0 global location. Which means that each location is referenced to an absolute location. The start point does NOT need to be 0,0,0.
While in the XYZ interface:
1) Zero out the "Start" row to make our start point the center of the locator.
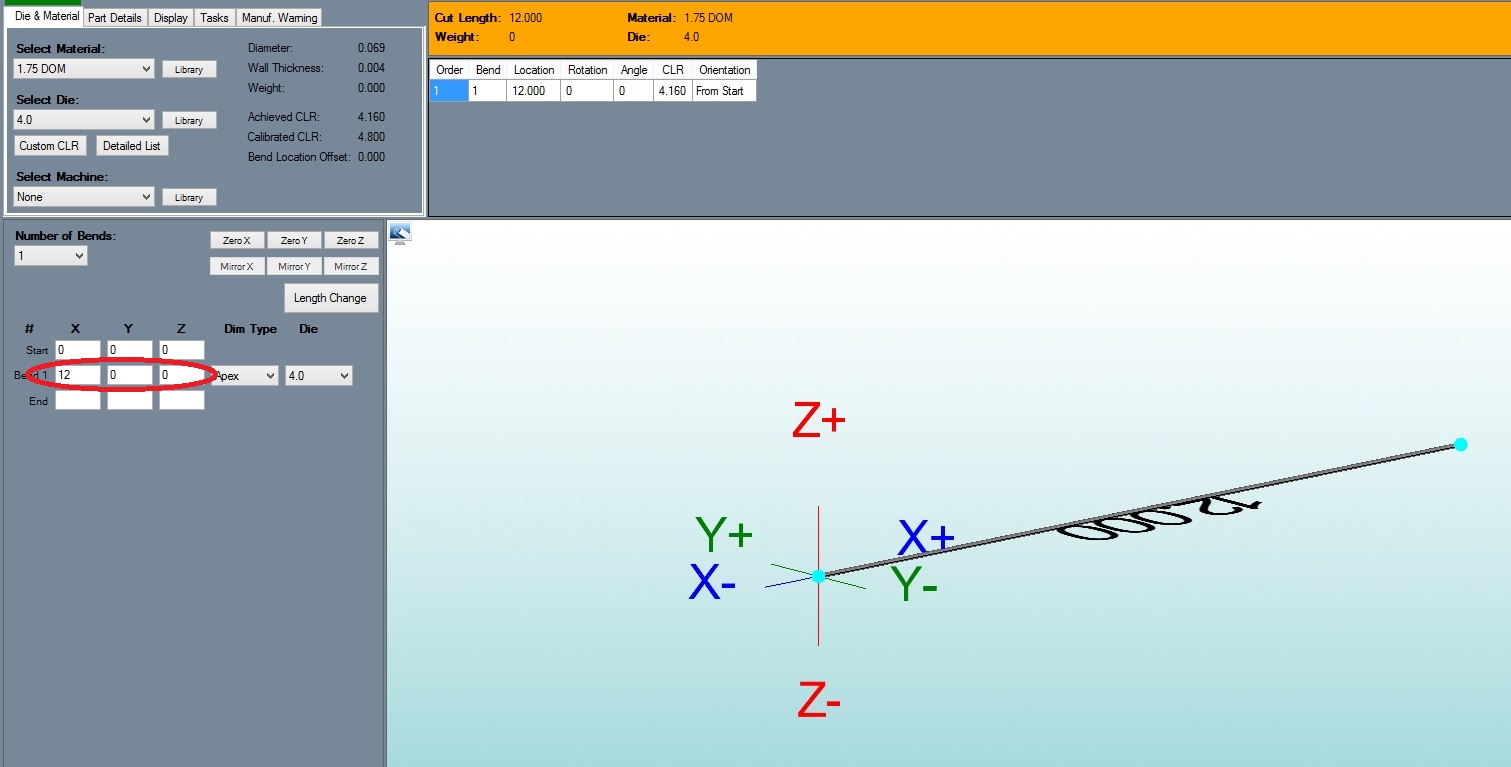
2) In the "Bend 1" row enter "12" for "X", and "0" for both "Y" and "Z". - This will give us 12" from the start of the tube, to the apex of the bend.
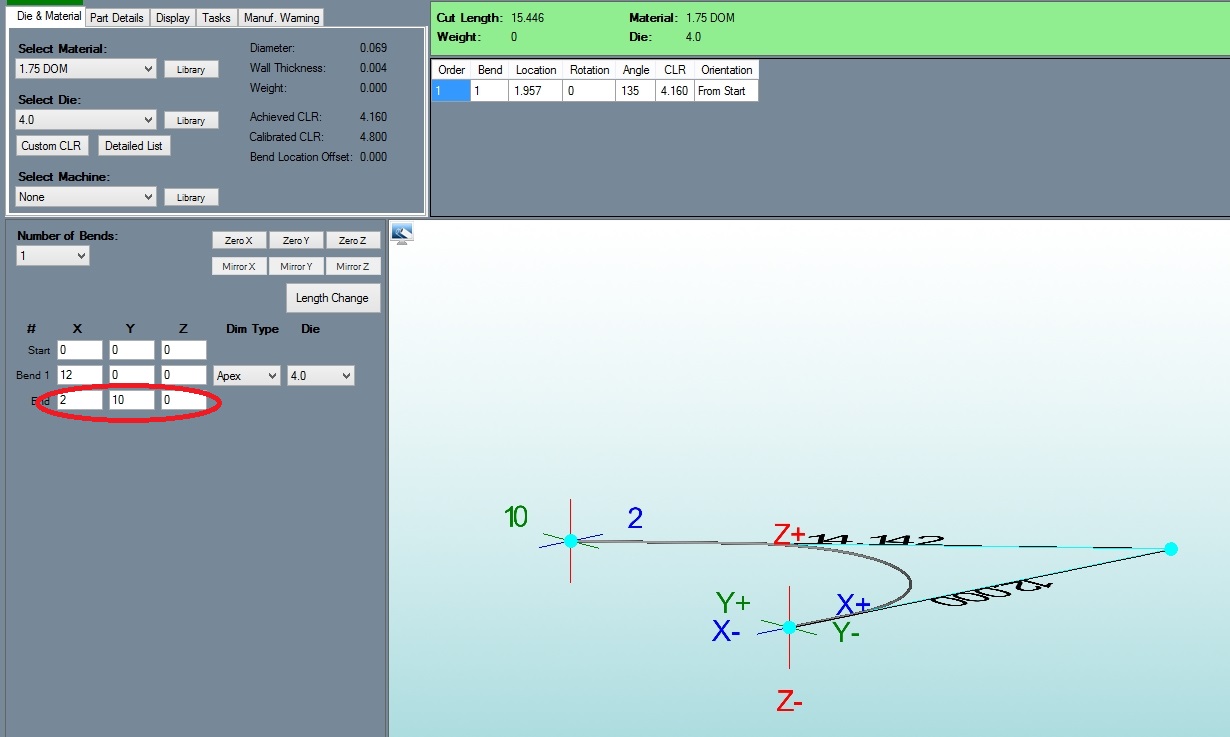
3) In the "End" row enter "2" for "X", "10" for "Y", and "0" for "Z". - From the apex of the bend, this will put our third point -10 back up the X axis and +10 down the Y axis.

