Difference between revisions of "Template Tutorial"
| Line 1: | Line 1: | ||
==Template== | ==Template== | ||
| − | This tutorial will step you through the basics of creating a part using a pre-defined template. | + | '''This tutorial will step you through the basics of creating a part using a pre-defined template.''' |
| − | + | ==Start Up== | |
| − | [[File: | + | 1) Start by double clicking the "'''Bend-Tech 7x'''" icon to start up the program.[[File:Bend_tech_icon.png]][[File:Material_Die.png|right]] |
| + | 2) Select the "'''Template'''" icon [[File:Template_icon.png]] in the [[Task Menu]] under the "'''Create New'''" section to open the Template interface. The window that opens should be labeled [New Part - Template]. | ||
| − | + | 3) For the purposes of this tutorial, click the "'''Maximize'''" button [[File:Min_Max_Close_Tab.png]] at the top right of the railing design window. | |
| − | |||
| − | + | *The Template selection menu will be occupied by a list of pre-defined templates available to use. | |
| − | |||
[[File:NewTemp1.jpg|450px]] | [[File:NewTemp1.jpg|450px]] | ||
| − | Scroll through | + | *Scroll through the templates until you see '''Double Bevel Hoop''' on '''page 4'''. Select the 'Double Bevel Hoop (Center Dims)' by clicking on it, as shown above. Click the 'Select' button in the bottom right corner of the window to bring the template into the design interface. |
Revision as of 08:29, 16 September 2014
Template
This tutorial will step you through the basics of creating a part using a pre-defined template.
Start Up
1) Start by double clicking the "Bend-Tech 7x" icon to start up the program.2) Select the "Template" icon ![]() in the Task Menu under the "Create New" section to open the Template interface. The window that opens should be labeled [New Part - Template].
in the Task Menu under the "Create New" section to open the Template interface. The window that opens should be labeled [New Part - Template].
3) For the purposes of this tutorial, click the "Maximize" button ![]() at the top right of the railing design window.
at the top right of the railing design window.
- The Template selection menu will be occupied by a list of pre-defined templates available to use.
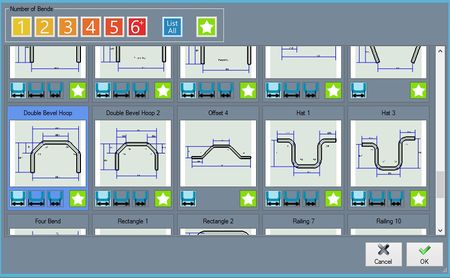
- Scroll through the templates until you see Double Bevel Hoop on page 4. Select the 'Double Bevel Hoop (Center Dims)' by clicking on it, as shown above. Click the 'Select' button in the bottom right corner of the window to bring the template into the design interface.
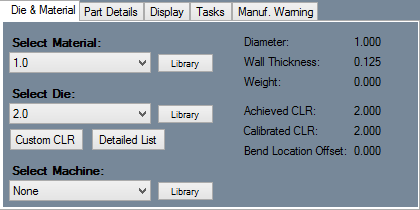
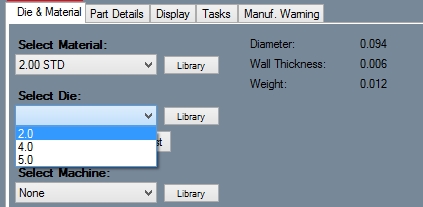
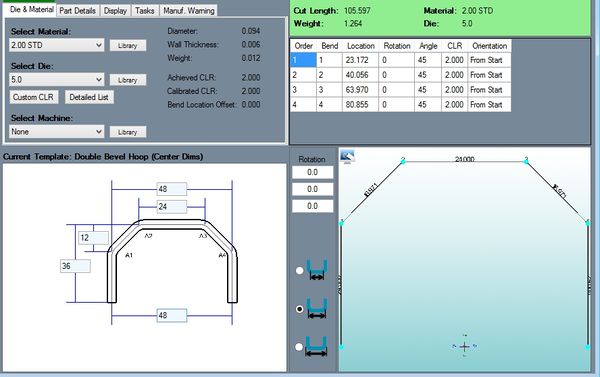
In the template design window, you will need to assign a die and material. In the Die & Material tab in the top left corner, click the drop down menu below Select Material and choose any material available in the list. Click the drop down menu below Select Die and select an appropriately sized die from the list.
Note: If a default die and material have already been set up, they will already be selected. In that case proceed to the next step.
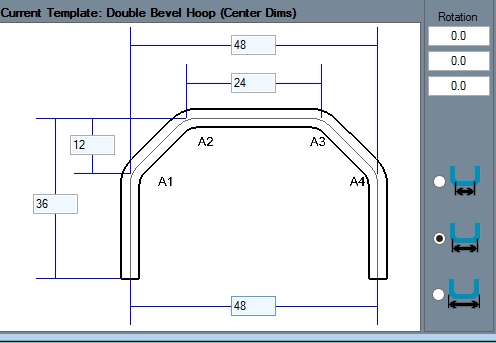
Once the die and material are selected, the part design panel will be open to edit. Below the tabbed section, a 2D image of the template will be shown. Each dimension line will have a field where a value can be entered. Enter the values that are shown in the image below.
As values are entered, the part display to the right and the results table will be updated automatically. One all the fields have been filled in correctly, the window should look similar to the image below. The part is now complete. The results table for the complete part is shown in the top right corner.
