Difference between revisions of "Bend-Tech SW Module Installation"
| Line 110: | Line 110: | ||
[[File:sw_mod13.png]] | [[File:sw_mod13.png]] | ||
| − | For a | + | For a full tutorial on importing parts , see [[SolidWorks Import Tutorial I]].''' |
__NOTOC__ | __NOTOC__ | ||
Revision as of 14:55, 6 December 2019
This article contains the instructions on how to update and install the Bend-Tech SW plugin to work with Solidworks.
This article also assumes you have administrative privileges on your computer. For this process to be successful, it is absolutely necessary that these privileges are available. If you do not have proper access, you may need to obtain proper privileges before continuing!
First, use the following link to download the latest update to the Bend-Tech SW plugin: Bend-Tech SW Plugin
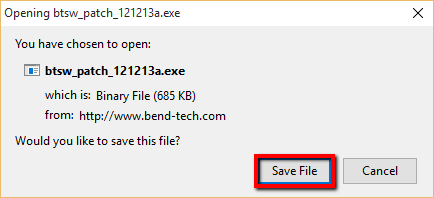
Download and save this update to your computer by clicking the Save File button.
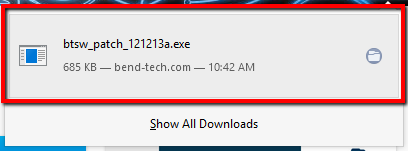
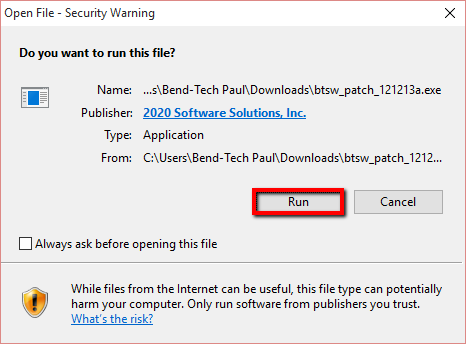
Once the download is complete, find the downloaded install file (btsw_patch_121213a.exe) in the downloads folder, or under the arrow ![]() in the upper right hand corner of your browser and run it (To run it, either double click or right click and hit Open).
in the upper right hand corner of your browser and run it (To run it, either double click or right click and hit Open).
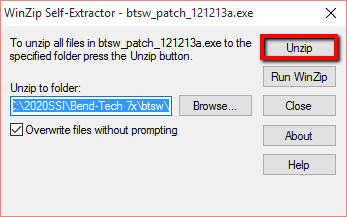
Once the WinZip window is shown, click the unzip button to install the patch.
Note: This method assumes your Bend-Tech is installed in the default directory. If Bend-Tech is not installed into the default directory (C:\2020ssi\Bend-Tech), you will need to modify the Unzip path in the Winzip window to match the install location of the Bend-Tech software.
After installing the patch, follow these steps to activate the SW plugin:
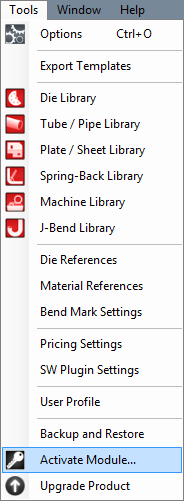
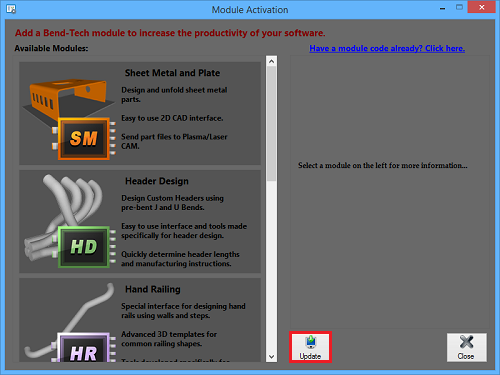
Step 1: If you purchased the SW Module separately from your Bend-Tech product, open the Tools - Activate Module screen press the Update button. If you purchased the SW Module along with your Bend-Tech product, skip to step 4.
Step 2: Your SW module should be activated at this point! Close down your Bend-Tech software by clicking the red X in the upper right corner or by going to File - Exit.
- If you are having trouble activating the SW module, please contact technical support.
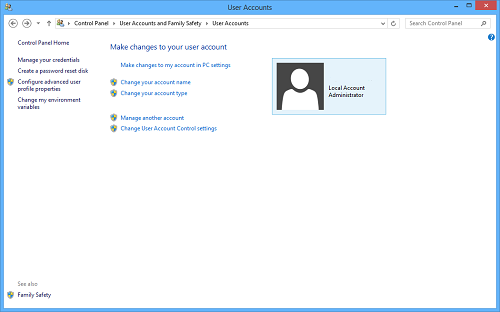
Step 3: Make sure you have administrative privileges and turn off Windows User Account Control (UAC).
- To turn off UAC, open the Control Panel and go to User Account Settings.
Step 4: At this point, ensure that both Bend-tech AND SolidWorks are NOT running. You cannot have any versions of either software open in order to continue.
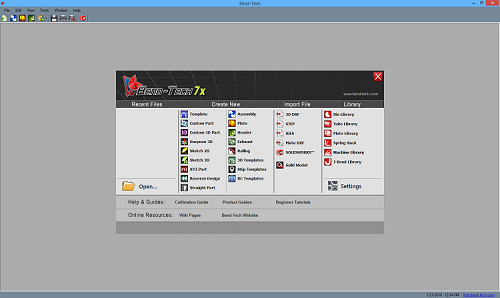
Step 5: Run the Bend-Tech 7x software and wait for it to fully load.
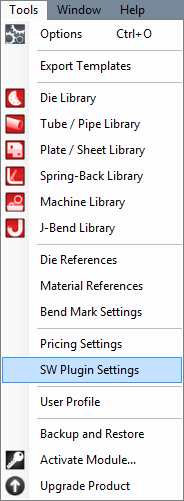
Step 6: Enable the SW module within Bend-Tech. Use the Tools - SW Plugin Settings menu at the top of the Bend-Tech window.
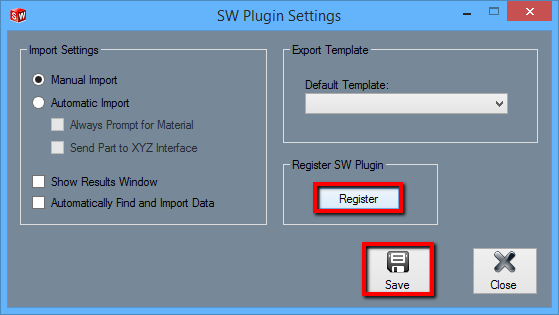
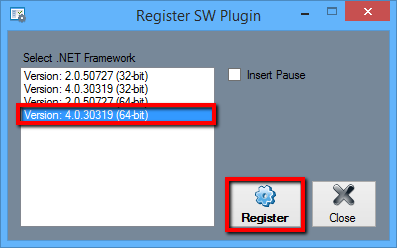
Step 7: Select the Register button within the Register SW Plugin section.
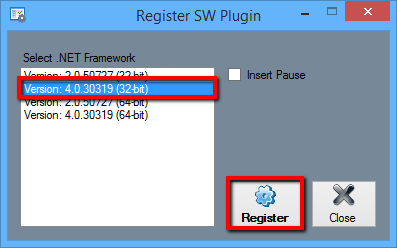
Step 8: Select the latest version of the .NET 32-bit Framework to install to. Click on the version in the list to select it.
Step 9: Select the Register button. You should see a black window flash and a message box appear.
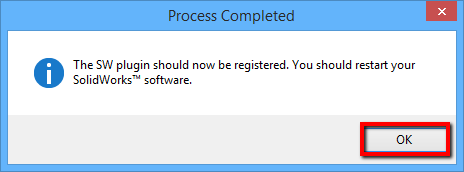
Another message box will pop up and to tell you that the plugin was been successfully registered.
Step 10: Now repeat steps 8 and 9, but select the latest version of the .NET 64-bit Framework instead.
Step 11: Fully exit out of the Bend-Tech software.
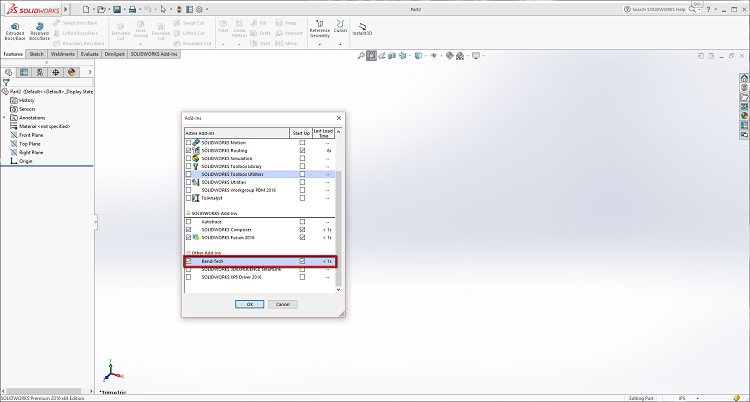
Step 12: Open your SolidWorks software and verify the Bend-Tech Add-In is installed properly. This can be done by accessing the Tools - Add-Ins menu in SolidWorks.
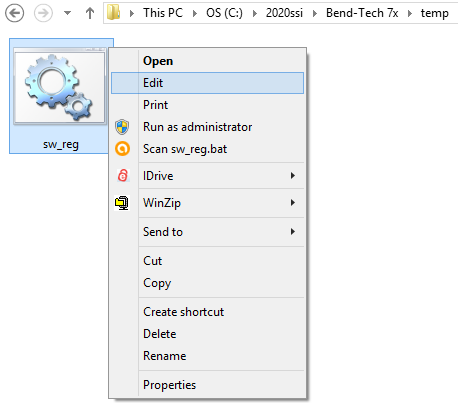
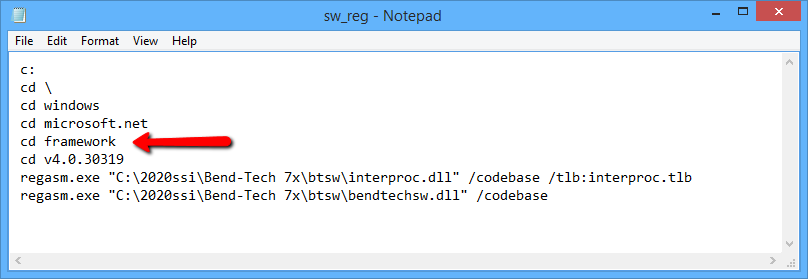
Step 13: If the Add-In is still not functioning, navigate to the Bend-Tech directory and look under the \temp\ folder ('C:\2020ssi\Bend-Tech\temp). First, right click on the SW batch file (sw_reg.bat) and select the edit option from the menu.
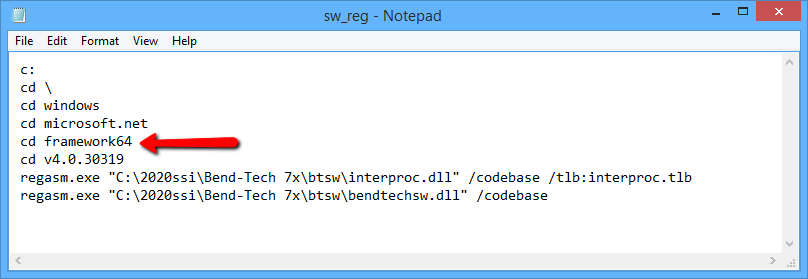
- Once the file has been opened, the 5 line will be "cd framework64". Delete the 64, so the line is just "cd framework" instead. Then save and close the file.
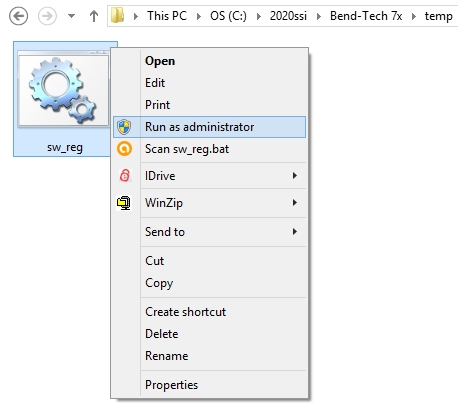
Step 14: Right click on the SW batch file and select Run as Administrator.
For a full tutorial on importing parts , see SolidWorks Import Tutorial I.
