Handrail Module
(Under Construction)
Bend-Tech 7x Wiki ::Handrail Module
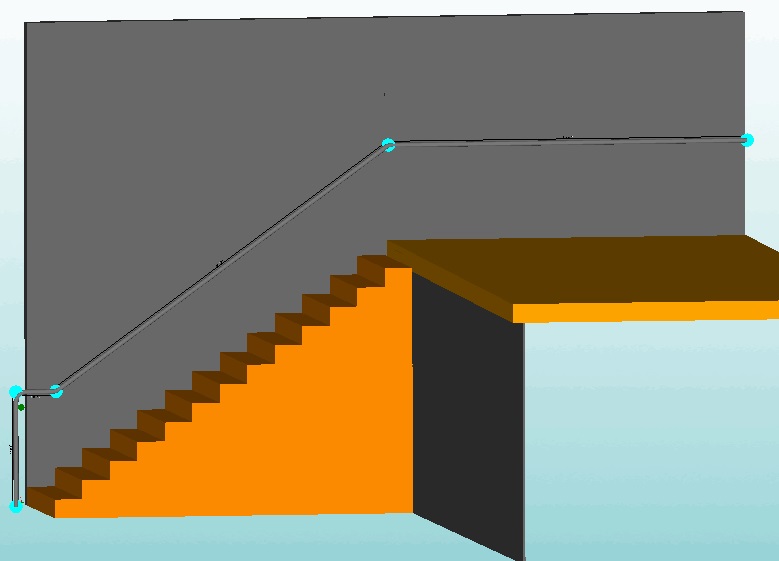
- The Bend-Tech Handrail Module (HR) is an add-on module for the Bend-Tech SE software program. It assists users in constructing any desired length of railing. New features include tabs for walls, steps and platforms which offer the option to create a mock up setting where the user can design the handrail they need. (This section does not go into detail about PickPoints although they are still used to extent in this module.)
- This add-on's new defaults allow the user to simply select a wall, a series of steps, and/or a platform without taking much time away from designing the desired railing.
Contents
Railing
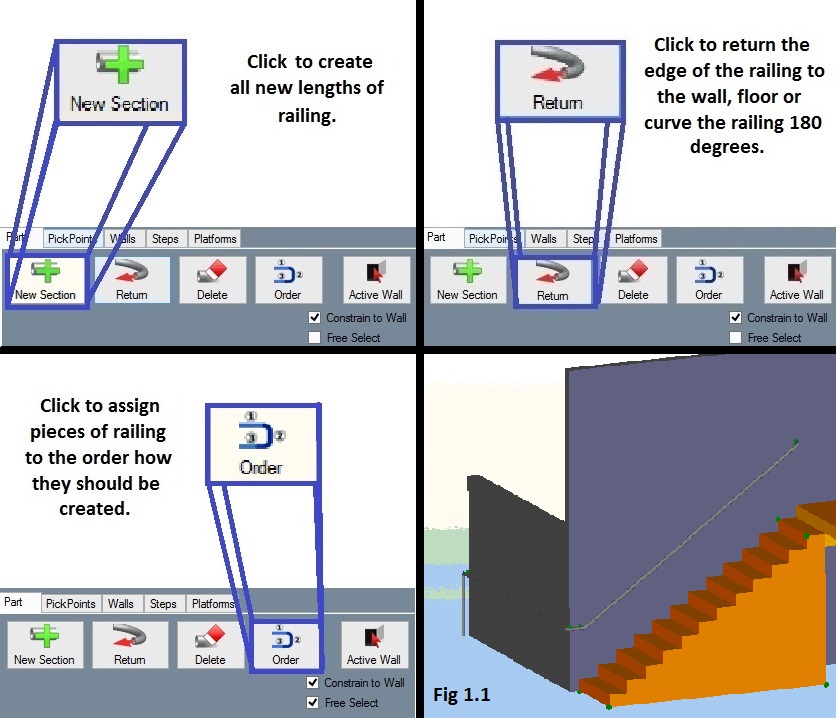
- The Part tab is where the user will find all the options for creating, ordering, editing and deleting lengths of railing.
New Section
- Selecting the New Section key will allow the user to create a new length of railing in the display area.
Return
- Selecting the Return key will allow the user to return the length of railing to either the wall it is constrained to, the floor, or return on itself by creating its own 180 degree bend.
- The option to Adjust to Length is also available within the Return function.
Order
- Selecting the Order key will allow the user to define the order in which lengths of railing are set to be connected to each other. Simply select each length of railing by clicking on them in the display area.
Delete
- Selecting the Delete key under this tab will allow the user to delete sections of railing from the display area.
Active Wall
- When dealing with multiple walls, users can click the Active Wall key in the Part tab to assign a railing to a specific wall.
Constrain to Wall
- Users can select the Constrain to Wall check box and the railing will be set along the same plane as the selected wall at a distance of 3 units (inches) offset by default.
Free Select
- Selecting the Free Select option in the check box, allows the user to have free reign over where to place their length of railing by using a two click process in the display area.
- When the Free Select check box is deselected, the user is confined to creating lengths of railing by using Pickpoints or default starting points. (Fig 1.1)
Walls
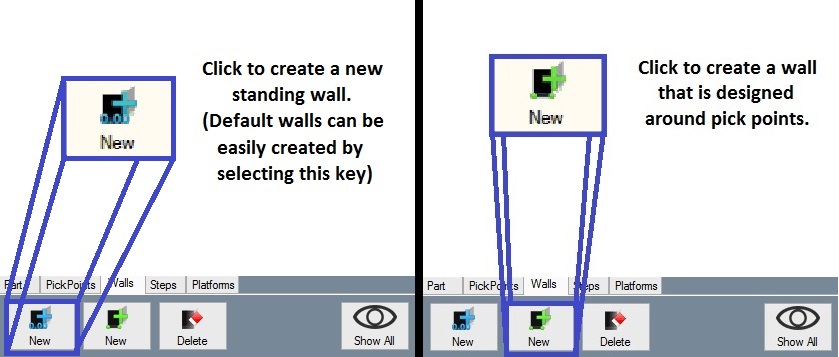
- The Walls tab is where the user will find all the options for creating standing walls.
Create Using Values
- By selecting the blue New key, the user will be able to adjust height, length, width and offset of the wall by entering the desired values in the corresponding fields.
- (Note) The default values are in inches and will create what seems like a large wall. Users may need to zoom out on the display screen.
- By selecting the blue New key, the user will be able to adjust height, length, width and offset of the wall by entering the desired values in the corresponding fields.
Rotation
- Walls can be rotated to any angle within the display by entering the desired angle in the unlabeled value field. (Default options are set at 90, 180, 270 and 360 degrees)
- Selecting the Flip Wall check box will change the side of the wall that the user will be working on.
Create Using Pickpoints
- Selecting the green New key will allow the user to create a wall confined to specific Pickpoints previously placed by the user.
- (Note) The user will need to have created a minimum of 3 Pickpoints to provide the wall with dimensions of length and width. Height will be set by default. (Dimensions can then be adjusted in the value fields once the design has been created.)
- Selecting the green New key will allow the user to create a wall confined to specific Pickpoints previously placed by the user.
Delete
- Selecting the Delete key under this tab will allow the user to delete sections of wall in the display area.
Steps
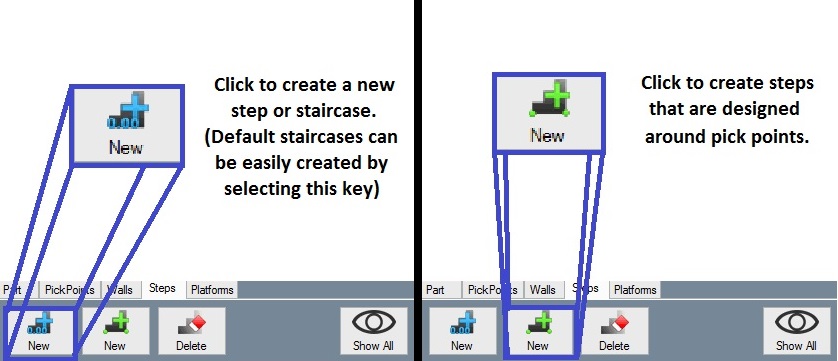
- The Steps tab is where the user will find all the options for creating single steps or staircases with any number of steps. The choice is easily set by the user in the New default tab.
Create Using Values
- By Selecting the blue New key, the user will be able to adjust width of the step/staircase, number of treads, tread width and riser height by entering the desired values in the corresponding fields.
Rotation
- Steps can be rotated to any angle within the display by entering the desired angle in the unlabeled value field. (Default options are set at 90, 180, 270 and 360 degrees)
- Selecting the Flip Steps check box will change the side of the steps that the user will be working on.
- (Note) If the user already flipped the wall in creating it, then they should also flip the steps.
Create Using Pickpoints
- Selecting the green New key will allow the user to create a step/staircase confined to specific Pickpoints previously placed by the user.
- (Note) The user will need to have created a minimum of 3 Pickpoints along the same axis to provide the step/staircase with dimensions of length and width. Height will be set by default. (Dimensions can then be adjusted in the value fields once the design has been created.)
- Selecting the green New key will allow the user to create a step/staircase confined to specific Pickpoints previously placed by the user.
Delete
- Selecting the Delete key under this tab will allow the user to delete sections of steps in the display area.
Platforms
- The Platforms tab is where the user will find the options for creating block platforms.
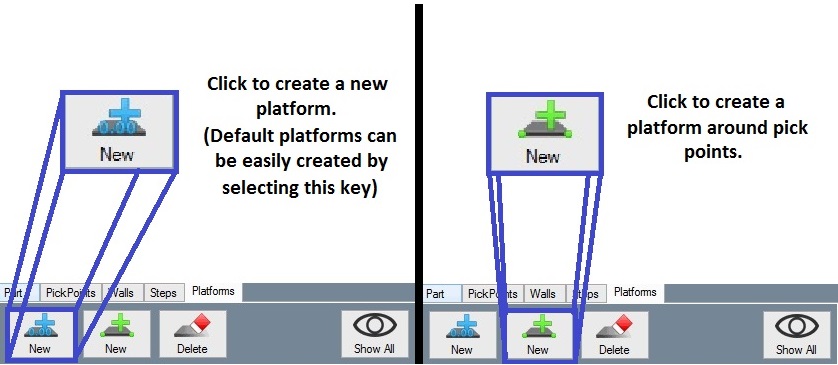
Create Using Values
- By Selecting the blue New key, the user will be able to adjust height, length and width by entering the desired values in the corresponding fields.
Rotation
- Platforms can be rotated to any angle within the display by entering the desired angle in the unlabeled value field. (Default options are set at 90, 180, 270 and 360 degrees)
- Selecting the Flip Platform check box will change the side of the platform that the user will be working on.
- (Note) If the user already flipped the wall and steps in creating them, then they should also flip the platform.
Create Using Pickpoints
- Selecting the green New key will allow the user to create a platform confined to specific Pickpoints previously placed by the user.
- (Note) The user will need to have created a minimum of 3 Pickpoints along the same axis to provide the platform with dimensions of length and width. Height will be set by default. (Dimensions can then be adjusted in the value fields once the design has been created.)
- Selecting the green New key will allow the user to create a platform confined to specific Pickpoints previously placed by the user.
Delete
- Selecting the Delete key under this tab will allow the user to delete sections of platform in the display area.
