Machine Control Screen
Contents
Dragon A-400 Machine Control Screen
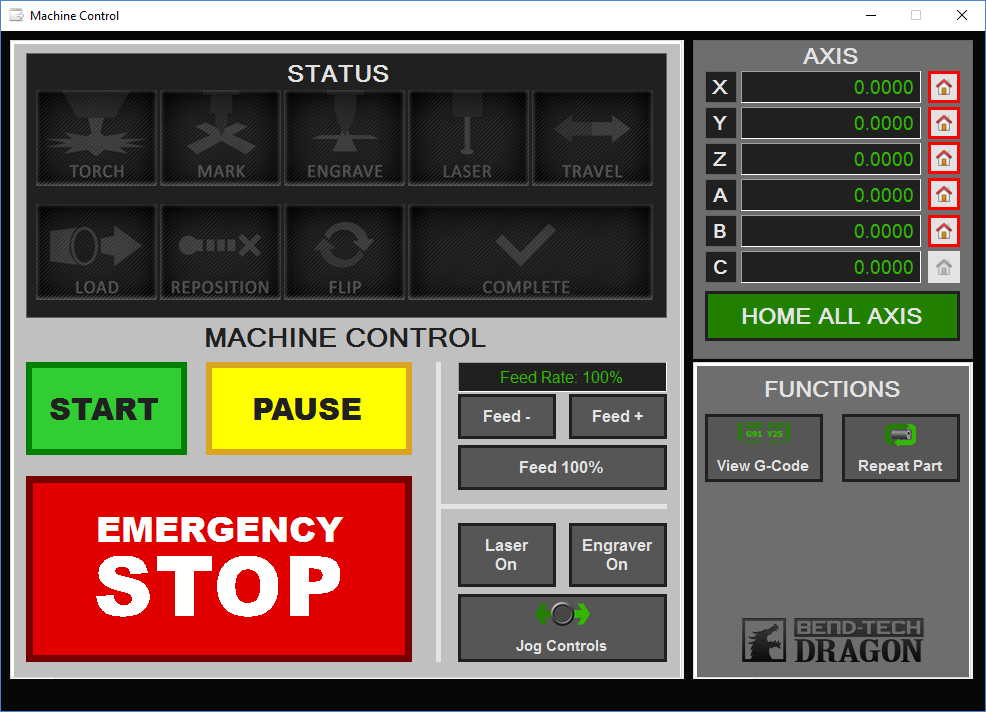
- The Dragon A-400 has a Machine Control screen similar to the A-150's Operator Panel, but will be accessible directly from the laptop/PC screen for use with the machine. This machine control screen will be used by the operator to jog different axes, home the machine, start any projects, check the status of any project and emergency stop the machine when necessary.
Status
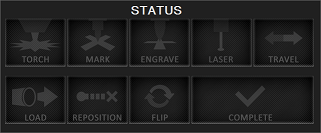
- Under the Status section, the operator panel includes separate windows for travel/action/instructional icons that will light up while the machine is undergoing a certain process. These light up in real time as the machine is in motion.
Machine Control
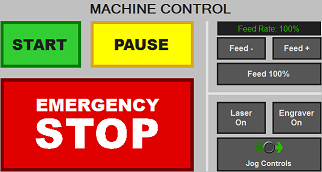
- Under the Machine Control section, users will have the means to Start, Pause and Stop a project that has been transferred to the machine, adjust feed rates using the Feed +, Feed - and Feed 100% buttons, and turn on the Laser, Engraver and Jog Controls. Jogging controls are explained below.
Jog Controls
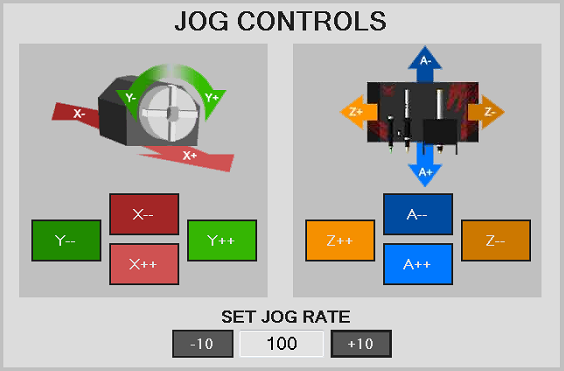
- Click on the Jog Controls to move the machine manually along its different axis.
- The Jog Controls move the machine in the following directions:
X: The front and back movement of the chuck trolley.
Y: The clockwise and counter-clockwise rotation movement of the chuck.
Z: The left and right movement of the tool head.
A: The up and down movement of the tool head.
- You can also change the jog rate on a percentage scale by clicking the -10 or +10 buttons in the Set Jog Rate section.
- Click the Close button from below in order to close the jog controls and reveal the Start and Pause buttons again.
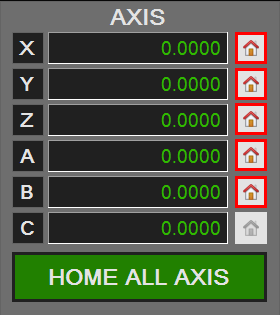
Axis
- The machine's Axis locations are shown here. You are able to home each individual axis by clicking the Home button next to it, or home every axis by clicking the Home All Axis button.
- The machine should be homed every time the machine is newly turned on, in the case that an E-stop is pushed, or in the event of a crash or a loss of connection with the Mach 3 software.
