Using the Cutting Plane Function
Using the "Cutting Plane" function to cut a section of tube is different from cutting tubes that intersect. This tool is used for cutting a specific place on a bend or straight tube that does not intersect another tube.
Cutting Plane
Using the cutting plane feature, a custom plane can be defined and used to place cuts anywhere on the assembly design.
To place a cutting plane, click the "New" ![]() button under the "Cutting" tab and click on a PickPoint to define the center/base point of the plane. Then click the first and second direction of the plane.
button under the "Cutting" tab and click on a PickPoint to define the center/base point of the plane. Then click the first and second direction of the plane.
Once a plane is place in the assembly, it can be used as a cutting feature and will allow straight cuts to be placed anywhere.
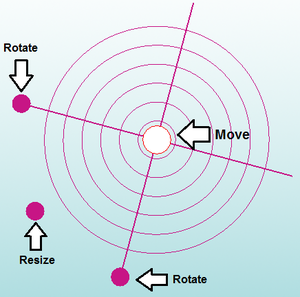
To move the plane, click the "Move" ![]() button. Then click and drag the move tools directly on the plane to move, resize, and rotate the plane. See image below.
button. Then click and drag the move tools directly on the plane to move, resize, and rotate the plane. See image below.
Once the cutting plane in in the correct position, the user can record a cut by selecting the "New Cut" ![]() button.
button.
Then, select the tube that you are trying to cut, followed by the cutting plane itself. If you've done everything right, the cutting plane will be highlighted when you place your cursor over it.
If the plane does not become highlighted when you place your cursor over it, try resizing the plane making it much larger than it is by default.
Lastly, select the "Complete" ![]() button and the new cut and information will show up on the left of the screen in the "Part List" section.
button and the new cut and information will show up on the left of the screen in the "Part List" section.

