Using Tangent for Bent Part
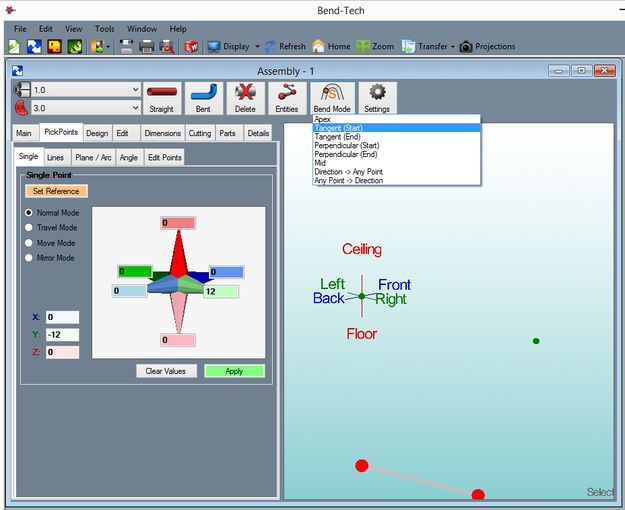
When using tangent to make your bent parts you need to use the Tangent Start and Tangent End bend locations for your part. First off you need to select your material and die for your parts. Then add a bent part to your assembly and give it the number of bends that you want, for this example we will be using a 3 bend part. Select your first point and then before selecting the next point, change your bend selection to Tangent Start and select the next point.
This point should be created using the Tangent Start for your bend location.
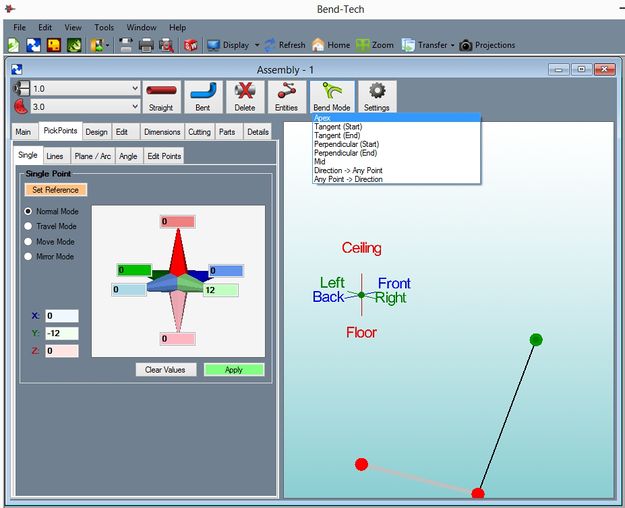
Any bend that is not apart of the Tangent Start and End should be created using the Apex bend location. In this case the bend located in the center of the part is going to Apex instead of Tangent End since it is not the end of the part.
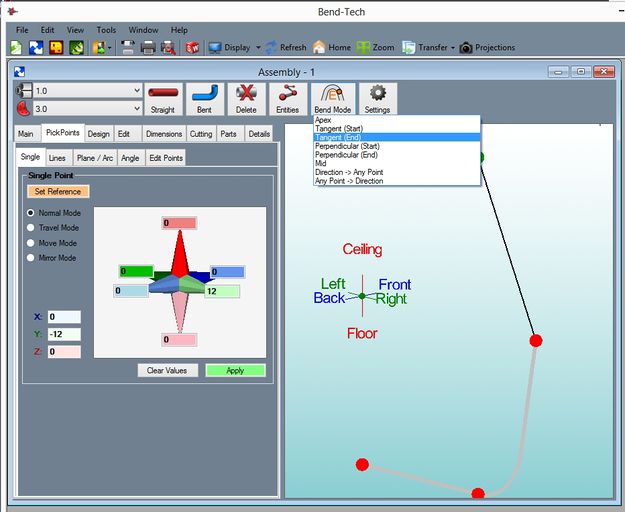
The last point in your bent part should be created using the Tangent End for your bend location. This will be the last thing you need to change when making your bent part.
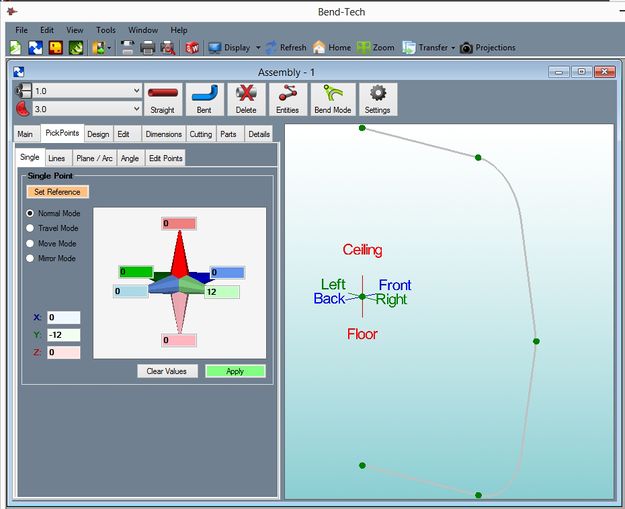
When it's all said and done, you should yourself a pretty nice looking bent part thanks to the Tangent Start and End bend locations.


