LRA
Bend-Tech 7x Wiki :: Assembly :: Design :: LRA
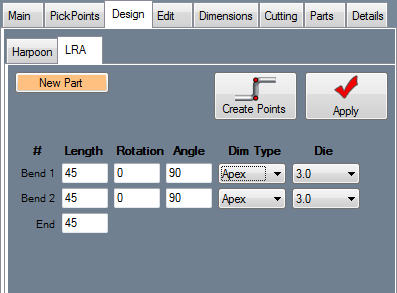
To begin designing a part using the LRA interface, click the New Part button. ![]()
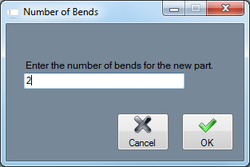
Next, enter the number of bends the new part will have in the prompt that appears.
Now the LRA design fields will be shown on the left side of the window.
First, select the starting point of the point by clicking on a PickPoint in the display area.
Enter the length, rotation, and angle values into the design fields to define the shape of the part. Once at least the first two rows in these fields are filled, a preview of the part will be shown in the display area. The part will be represented by a dark purple line and the current bend being designed will be highlighted in red.
The direction of the part can be adjusted by choosing a first and second direction point. See the example below.
Each bend will have the option to choose a die and a dimension type. To choose a die, click the Die drop down menu and select an option from the list. To choose a dimension type, click the Dim Type, and select Apex, Tangent, or Perp from the list.
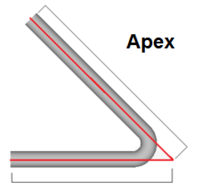
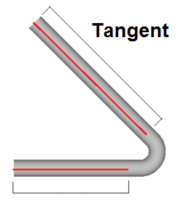
Apex will measure to the outside intersection (apex) of the bends two legs. Tangent will measure to the edge of the bends, the tangents, so no bent material will be included in the measurements. (See images below) Perp is basically the tangent plus the CLR of the bend.
To add points, click the Create Points button ![]() to place points along the current part. Note: This will only place points, the actual part will not be created.
to place points along the current part. Note: This will only place points, the actual part will not be created.


