Difference between revisions of "Plate"
(→Settings) |
|||
| (7 intermediate revisions by the same user not shown) | |||
| Line 1: | Line 1: | ||
'''Sheet Metal/Plate''' [[File:W81A.JPG|right]] | '''Sheet Metal/Plate''' [[File:W81A.JPG|right]] | ||
| − | Due to its length, the Sheet Metal Module Guide has a Table of Contents to accommodate the user. | + | Due to its length, the Sheet Metal Module Guide has a Table of Contents and banners that are collapsed by default to accommodate the user. Simply click on the banner that pertains to your interest and it will reveal all of the information for that section. |
| − | The sheet metal module offers the ability to create designs made of sheet metal using a wide variety of tools and functions. In order to keep these tools and functions under | + | The sheet metal module offers the ability to create designs made of sheet metal using a wide variety of tools and functions. In order to keep these tools and functions under your control, this guide will assist you by explaining the functions of each button and mode of operation. |
The sheet metal interface allows bent and straight sheet metal parts to be assembled together. Parts can also be cut and the wrappers for these cuts can be printed out here. | The sheet metal interface allows bent and straight sheet metal parts to be assembled together. Parts can also be cut and the wrappers for these cuts can be printed out here. | ||
| + | |||
| + | ==Sheet Metal/Plate Tutorial Videos== | ||
| + | |||
| + | [[File:platetuticon.png|40px|link=https://www.youtube.com/watch?v=ehmaJpD7TQE]] '''[https://www.youtube.com/watch?v=ehmaJpD7TQE Plate/Sheet Metal Tutorial]''' | ||
| + | [[File:platetuticon2.png|40px|link=https://www.youtube.com/watch?v=sS97AZmk3SM]] '''[https://www.youtube.com/watch?v=sS97AZmk3SM Advanced Sheet Metal Tutorial]''' | ||
| + | [[File:platetuticon2.png|40px|link=https://www.youtube.com/watch?v=AUXRUdtU-Wc]] '''[https://www.youtube.com/watch?v=AUXRUdtU-Wc Sheet Metal Pickpoints Tutorial]''' | ||
| + | |||
| + | ==Sheet Metal Design== | ||
To open a new plate design: | To open a new plate design: | ||
| Line 264: | Line 272: | ||
<li style="display: list-item;">'''Features to Include:'''<div class="usermessage mw-customtoggle-myfti" style="background-color: #B55656; border: solid 1px #B55656;">Click here for Features to Include functions</div> | <li style="display: list-item;">'''Features to Include:'''<div class="usermessage mw-customtoggle-myfti" style="background-color: #B55656; border: solid 1px #B55656;">Click here for Features to Include functions</div> | ||
<ul class="mw-collapsible mw-collapsed" id="mw-customcollapsible-myfti"> | <ul class="mw-collapsible mw-collapsed" id="mw-customcollapsible-myfti"> | ||
| − | <li style="display: list-item;">[[File:edit_delete_options2.png|right]]In the "'''Features to Include:'''" section, select which features to include during the deletion process. When selecting multiple entities with a Window or Polygon selection, groups of entities can be selected here to ensure that they will be deleted, or unselected to prevent them from being deleted.</li></li></ul> | + | <li style="display: list-item;">[[File:edit_delete_options2.png|right]]'''Features to Include:''' In the "'''Features to Include:'''" section, select which features to include during the deletion process. When selecting multiple entities with a Window or Polygon selection, groups of entities can be selected here to ensure that they will be deleted, or unselected to prevent them from being deleted.</li></li></ul> |
<div style="clear:both"></div> | <div style="clear:both"></div> | ||
<li style="display: list-item;">'''Colors to Include:'''<div class="usermessage mw-customtoggle-mycti" style="background-color: #B55656; border: solid 1px #B55656;">Click here for Colors to Include functions</div> | <li style="display: list-item;">'''Colors to Include:'''<div class="usermessage mw-customtoggle-mycti" style="background-color: #B55656; border: solid 1px #B55656;">Click here for Colors to Include functions</div> | ||
| Line 284: | Line 292: | ||
<li style="display: list-item;">'''Features to Include:'''<div class="usermessage mw-customtoggle-myfti" style="background-color: #B55656; border: solid 1px #B55656;">Click here for Features to Include functions</div> | <li style="display: list-item;">'''Features to Include:'''<div class="usermessage mw-customtoggle-myfti" style="background-color: #B55656; border: solid 1px #B55656;">Click here for Features to Include functions</div> | ||
<ul class="mw-collapsible mw-collapsed" id="mw-customcollapsible-myfti"> | <ul class="mw-collapsible mw-collapsed" id="mw-customcollapsible-myfti"> | ||
| − | <li style="display: list-item;">[[File:edit_move_features2include.png|right]]In the "'''Features to Include:'''" section, select which features to include during the deletion process. When selecting multiple entities with a Window or Polygon selection, groups of entities can be selected here to ensure that they will be deleted, or unselected to prevent them from being deleted.</li></li></ul> | + | <li style="display: list-item;">[[File:edit_move_features2include.png|right]]'''Features to Include:''' In the "'''Features to Include:'''" section, select which features to include during the deletion process. When selecting multiple entities with a Window or Polygon selection, groups of entities can be selected here to ensure that they will be deleted, or unselected to prevent them from being deleted.</li></li></ul> |
<div style="clear:both"></div> | <div style="clear:both"></div> | ||
<li style="display: list-item;">'''Move/Copy Method:'''<div class="usermessage mw-customtoggle-mymove_copy_method" style="background-color: #B55656; border: solid 1px #B55656;">Click here for Move/Copy Method functions</div> | <li style="display: list-item;">'''Move/Copy Method:'''<div class="usermessage mw-customtoggle-mymove_copy_method" style="background-color: #B55656; border: solid 1px #B55656;">Click here for Move/Copy Method functions</div> | ||
| Line 327: | Line 335: | ||
<li style="display: list-item;">'''Features to Include:'''<div class="usermessage mw-customtoggle-myfti" style="background-color: #B55656; border: solid 1px #B55656;">Click here for Features to Include functions</div> | <li style="display: list-item;">'''Features to Include:'''<div class="usermessage mw-customtoggle-myfti" style="background-color: #B55656; border: solid 1px #B55656;">Click here for Features to Include functions</div> | ||
<ul class="mw-collapsible mw-collapsed" id="mw-customcollapsible-myfti"> | <ul class="mw-collapsible mw-collapsed" id="mw-customcollapsible-myfti"> | ||
| − | <li style="display: list-item;">[[File:edit_scale_fti1.png|right]]In the "'''Features to Include:'''" section, select which features to include during the deletion process. When selecting multiple entities with a Window or Polygon selection, groups of entities can be selected here to ensure that they will be scaled, or unselected to prevent them from being scaled.</li></li></ul> | + | <li style="display: list-item;">[[File:edit_scale_fti1.png|right]]'''Features to Include:''' In the "'''Features to Include:'''" section, select which features to include during the deletion process. When selecting multiple entities with a Window or Polygon selection, groups of entities can be selected here to ensure that they will be scaled, or unselected to prevent them from being scaled.</li></li></ul> |
<div style="clear:both"></div> | <div style="clear:both"></div> | ||
<li style="display: list-item;">'''Scale Factor:'''<div class="usermessage mw-customtoggle-myscalefactor" style="background-color: #B55656; border: solid 1px #B55656;">Click here for Scale Factor functions</div> | <li style="display: list-item;">'''Scale Factor:'''<div class="usermessage mw-customtoggle-myscalefactor" style="background-color: #B55656; border: solid 1px #B55656;">Click here for Scale Factor functions</div> | ||
| Line 350: | Line 358: | ||
<li style="display: list-item;">'''Features to Include:'''<div class="usermessage mw-customtoggle-myfti2" style="background-color: #B55656; border: solid 1px #B55656;">Click here for Features to Include functions</div> | <li style="display: list-item;">'''Features to Include:'''<div class="usermessage mw-customtoggle-myfti2" style="background-color: #B55656; border: solid 1px #B55656;">Click here for Features to Include functions</div> | ||
<ul class="mw-collapsible mw-collapsed" id="mw-customcollapsible-myfti2"> | <ul class="mw-collapsible mw-collapsed" id="mw-customcollapsible-myfti2"> | ||
| − | <li style="display: list-item;">[[File:edit_scale_fti1.png|right]]In the "'''Features to Include:'''" section, select which features to include during the deletion process. When selecting multiple entities with a Window or Polygon selection, groups of entities can be selected here to ensure that they will be copied, or unselected to prevent them from being copied.</li></li></ul> | + | <li style="display: list-item;">[[File:edit_scale_fti1.png|right]]'''Features to Include:''' In the "'''Features to Include:'''" section, select which features to include during the deletion process. When selecting multiple entities with a Window or Polygon selection, groups of entities can be selected here to ensure that they will be copied, or unselected to prevent them from being copied.</li></li></ul> |
<div style="clear:both"></div> | <div style="clear:both"></div> | ||
<li style="display: list-item;">'''Copy Method:'''<div class="usermessage mw-customtoggle-mycopymethod" style="background-color: #B55656; border: solid 1px #B55656;">Click here for Copy Method functions</div> | <li style="display: list-item;">'''Copy Method:'''<div class="usermessage mw-customtoggle-mycopymethod" style="background-color: #B55656; border: solid 1px #B55656;">Click here for Copy Method functions</div> | ||
| Line 384: | Line 392: | ||
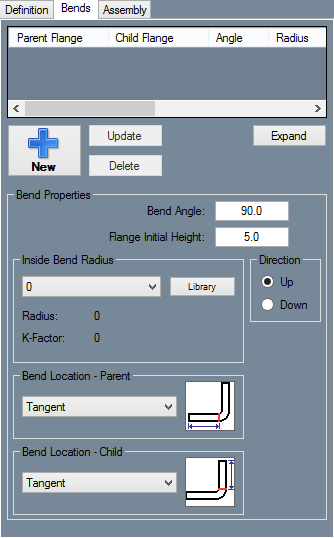
<li style="display: list-item;">'''Direction:''' Select if the bend should bend up or down in the "'''Direction:'''" area.</li> | <li style="display: list-item;">'''Direction:''' Select if the bend should bend up or down in the "'''Direction:'''" area.</li> | ||
<li style="display: list-item;">'''Bend Location:''' Select the "'''Parent:'''" and "'''Child:'''" bend locations using their respective drop down menus.</li></ul> | <li style="display: list-item;">'''Bend Location:''' Select the "'''Parent:'''" and "'''Child:'''" bend locations using their respective drop down menus.</li></ul> | ||
| − | |||
| − | |||
| − | |||
| − | |||
<div style="clear:both"></div> | <div style="clear:both"></div> | ||
| Line 434: | Line 438: | ||
<li style="display: list-item;">'''Geometric Library:'''<div class="usermessage mw-customtoggle-myGeometricLibrary" style="background-color: #A0A0A0; border: solid 1px #A0A0A0;">Click here for Geometric Library functions</div> | <li style="display: list-item;">'''Geometric Library:'''<div class="usermessage mw-customtoggle-myGeometricLibrary" style="background-color: #A0A0A0; border: solid 1px #A0A0A0;">Click here for Geometric Library functions</div> | ||
<ul class="mw-collapsible mw-collapsed" id="mw-customcollapsible-myGeometricLibrary"> | <ul class="mw-collapsible mw-collapsed" id="mw-customcollapsible-myGeometricLibrary"> | ||
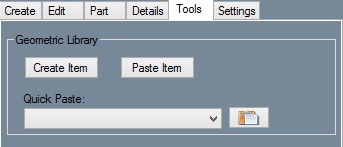
| − | <li style="display: list-item;">[[File:Toolstab1.png|right]]'''Create Item:''' Select the "'''Create Item:'''" button and you will be brought to the "'''Selection Features:'''" page. From there, choose the method of selection and which Features and Colors to include in the selection process. Once a method is chosen, select an entity or entities from the display area and select the "'''Complete:'''" button. Then, to save off the item(s) to the Geometric Library, select the Base Point of the item and name the item. Finally, to get back to the Tools screen, click the "'''Cancel:'''" button.</li> | + | <li style="display: list-item;">[[File:Toolstab1.png|right]]'''Create Item:''' Select the "'''Create Item:'''" button and you will be brought to the "'''Selection Features:'''" page. From there, choose the method of selection and which Features and Colors to include in the selection process. Once a method is chosen, select an entity or entities from the display area and select the "'''Complete:'''" button. Then, to save off the item(s) to the [[Plate: Geometric Library|Geometric Library]], select the Base Point of the item and name the item. Finally, to get back to the Tools screen, click the "'''Cancel:'''" button.</li> |
<li style="display: list-item;">'''Paste Item:''' After an item has been added to the Geometric Library, select the "'''Paste Item:'''" button to select the item from the list. In the Library, under the "'''Options:'''" section, users can Mirror the part Vertically or Horizontally by checking either checkbox, change the size of the part in the "'''Scale:'''" value field, or give the part rotation in the "'''Rotation:'''" value field. In the "'''Properties:'''" section, users can see the entity's original dimensions in the "'''Item Bounds:'''" field and add notes to the "'''Notes:'''" section. Select the "'''Paste:'''" button on the bottom of the screen to place the item into the display area.</li> | <li style="display: list-item;">'''Paste Item:''' After an item has been added to the Geometric Library, select the "'''Paste Item:'''" button to select the item from the list. In the Library, under the "'''Options:'''" section, users can Mirror the part Vertically or Horizontally by checking either checkbox, change the size of the part in the "'''Scale:'''" value field, or give the part rotation in the "'''Rotation:'''" value field. In the "'''Properties:'''" section, users can see the entity's original dimensions in the "'''Item Bounds:'''" field and add notes to the "'''Notes:'''" section. Select the "'''Paste:'''" button on the bottom of the screen to place the item into the display area.</li> | ||
| − | <li style="display: list-item;">'''Quick Paste:''' If the user has saved predefined parts to the Geometric Library already, they can select the entity from the "'''Quick Paste:'''" drop down menu and select the "'''Paste:'''" button next to it in order to paste it into the display area. The base point will always be the same as when the user first set it.</li></ul> | + | <li style="display: list-item;">'''Quick Paste:''' If the user has saved predefined parts to the [[Plate: Geometric Library|Geometric Library]] already, they can select the entity from the "'''Quick Paste:'''" drop down menu and select the "'''Paste:'''" button next to it in order to paste it into the display area. The base point will always be the same as when the user first set it.</li></ul> |
<div style="clear:both"></div> | <div style="clear:both"></div> | ||
<li style="display: list-item;">'''Flat Layout:'''<div class="usermessage mw-customtoggle-myflatlayout" style="background-color: #A0A0A0; border: solid 1px #A0A0A0;">Click here for Flat Layout functions</div> | <li style="display: list-item;">'''Flat Layout:'''<div class="usermessage mw-customtoggle-myflatlayout" style="background-color: #A0A0A0; border: solid 1px #A0A0A0;">Click here for Flat Layout functions</div> | ||
Latest revision as of 09:42, 20 February 2018
Due to its length, the Sheet Metal Module Guide has a Table of Contents and banners that are collapsed by default to accommodate the user. Simply click on the banner that pertains to your interest and it will reveal all of the information for that section.
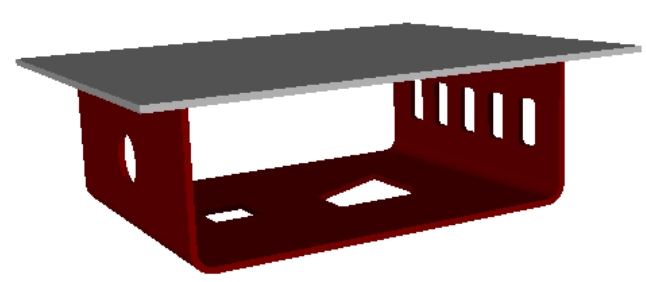
The sheet metal module offers the ability to create designs made of sheet metal using a wide variety of tools and functions. In order to keep these tools and functions under your control, this guide will assist you by explaining the functions of each button and mode of operation.
The sheet metal interface allows bent and straight sheet metal parts to be assembled together. Parts can also be cut and the wrappers for these cuts can be printed out here.
Contents
[hide]Sheet Metal/Plate Tutorial Videos
![]() Plate/Sheet Metal Tutorial
Plate/Sheet Metal Tutorial
![]() Advanced Sheet Metal Tutorial
Advanced Sheet Metal Tutorial
![]() Sheet Metal Pickpoints Tutorial
Sheet Metal Pickpoints Tutorial
Sheet Metal Design
To open a new plate design:
1.) Go to the File menu, select New-->Plate.
2.) Click the New Plate icon ![]() at the top of the window.
at the top of the window.
...OR
3.) Select the Plate option from the Task Menu that appears when the software starts up, when all designs are closed, or through the view menu.
Icon Toolbar
- The Tool Bar is the row of icons just below the Main Menu Bar.
Click the New Part icon ![]() to open the create new menu. This menu will allow you to choose a new part designer interface and begin a new part design.
to open the create new menu. This menu will allow you to choose a new part designer interface and begin a new part design.
Click the New Assembly icon ![]() to open a new assembly design. See the Assembly page for further information on creating an assembly.
to open a new assembly design. See the Assembly page for further information on creating an assembly.
Click the New Plate icon ![]() to open a new plate design. See the Plate page for further information on designing a plate.
to open a new plate design. See the Plate page for further information on designing a plate.
Click the New Header icon ![]() to open a new header design. See the Header Design page for further information.
to open a new header design. See the Header Design page for further information.
Click the Open icon ![]() to open a part, assembly, plate, or header file.
to open a part, assembly, plate, or header file.
Click the Save icon ![]() to save the current active window's progress. If the current window is a new and hasn't been saved previously, the part will need to be given a name and location. Click 'Save' in the Save window to save.
to save the current active window's progress. If the current window is a new and hasn't been saved previously, the part will need to be given a name and location. Click 'Save' in the Save window to save.
Click the Print icon ![]() to print out an image of the current view of the plate design in the display.
to print out an image of the current view of the plate design in the display.
Click the Print Preview icon ![]() to view a preview of the plate design image print out.
to view a preview of the plate design image print out.
Click the Solidworks icon ![]() to import a part file from Solidworks that has been sent to Bend-Tech.
to import a part file from Solidworks that has been sent to Bend-Tech.
Click the Display menu ![]() to alternate between design, defined, 3D wireframe, 3D shaded, and flat layout mode. See the design mode page for information on each of these options.
to alternate between design, defined, 3D wireframe, 3D shaded, and flat layout mode. See the design mode page for information on each of these options.
Click the Refresh icon ![]() to refresh the part display.
to refresh the part display.
Click the Home button ![]() to reset the 3D part display to its original default view.
to reset the 3D part display to its original default view.
Click the Zoom button ![]() to zoom all the way in on the current view of the 3D part display and fit it to the display frame.
to zoom all the way in on the current view of the 3D part display and fit it to the display frame.
Color: Click the color icon to change the color of future point and line features in the plate design display.
Line Type: Any new lines that are placed will be the type of line that is selected in the Line Type drop down menu. Click the small picture of a line to the right of the phrase "Line Type" to open the Line Type drop down menu.
Layer: Use the Layer drop down menu to select a layer. You can only work on the currently selected layer.
Flange: To switch the active flange, use the Flange drop down menu.
Origin
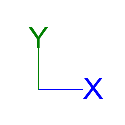
The "Origin" is the cross section between the X and the Y located in the display area on the right of the screen. This is a great place to start a project as a first reference point. For users who have Bend-Tech and are using Sheet Metal as a module, think of this Origin as a Tri-Star.
