Difference between revisions of "Dragon Nesting Tutorial"
| Line 13: | Line 13: | ||
| − | 2. With the | + | 2. With the Dragon Design window open, click on the '''Transfer to Nesting''' [[File:Drag_Transfer_To-Nesting1.png]] drop down menu at the top of the screen and select the '''New Project''' option. |
[[File:New_Nesting_Proj1.png]] | [[File:New_Nesting_Proj1.png]] | ||
| − | 3. | + | 3. Now, maximize the screen [[File:Min_Max_Close_Tab.png]] and enter '''140''' into the '''Stock Length:''' value field to the left of the display screen. ''The '''Web Size:''' should be set to '''0.5''' already by default.'' |
| + | |||
| + | 4. | ||
Revision as of 14:33, 27 January 2016
Dragon Nesting Tutorial 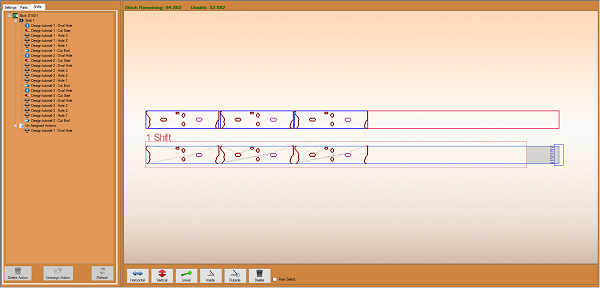

Things To Know
- This tutorial will step you through the process of creating a nesting project in Bend-Tech Dragon and show you how simple it is to send your project to your Dragon machine. As you walk through this tutorial, procedures are designed based on your knowledge of earlier procedures. Because of this, it is very important that you carefully step through this guide, understanding everything along the way.
If you have not completed the Dragon Straight Part Tutorial and Dragon Custom Design Tutorial, please do so before continuing any further.
Tutorial
1. Start by opening the Bend-Tech Dragon software and opening the file saved from the Dragon Custom Design Tutorial labeled Dragon Test2. Do this by selecting File - Open - Dragon Design from the top left of the window, selecting the file, then clicking the Open button.


2. With the Dragon Design window open, click on the Transfer to Nesting ![]() drop down menu at the top of the screen and select the New Project option.
drop down menu at the top of the screen and select the New Project option.

3. Now, maximize the screen ![]() and enter 140 into the Stock Length: value field to the left of the display screen. The Web Size: should be set to 0.5 already by default.
and enter 140 into the Stock Length: value field to the left of the display screen. The Web Size: should be set to 0.5 already by default.
4.