File
Bend-Tech 7x Wiki :: Main Menu Bar :: File
Open: Part, plate, and assembly files can be opened under the 'Open' option. Place cursor on 'Open' to access each file type. Choose either 'Tube', 'Assembly', 'Plate', 'Header', or 1D Nesting to open a file of the chosen type. Once an option is selected, the Open menu will appear. Choose a file to open and click 'Open' to open it into a design window.
Close: Click the 'Close' option to close the current active window. If the design hasn't been saved yet, a window asking whether to save it or not will display.
Close All: Click the 'Close All' button to close all design windows. If any of designs have not been saved, each un-saved part windows will have a prompt asking whether to save or not. To save it, click 'Yes', give it a name, and click the 'Save' button. Click 'No' to close without saving. Click 'Cancel' to neither close or save.
Save: Click the 'Save' option to save any progress in the current active window. If the design has already been saved, it will be saved to the file it was previously saved in. If the part hasn't been saved previously, the Save menu will appear. Give the design a name and click the 'Save' button.
Save As: Click the 'Save As' option to save the current design in a new file location. The Save menu will open. Give the design a name and click the 'Save' button.
Save All: Click the 'Save All' option to save progress in all open design windows. If any of the designs have not been saved previously, a Save menu will appear for each window. Give the design(s) names and click 'Save'.
Import: Part, assembly, and plate design files can be imported using the 'Import' option. Click the "Import" link for further information on importing designs.
Export: Part, assembly, and plate designs can be exported as Data (.dxf), Bitmap image (.bmp), Template, STEP (.step/.stp), IGES (.iges/.igs), BREP (.brep) files using the 'Export' option. Click the "Export" link for further information on exporting designs.
Convert Files:
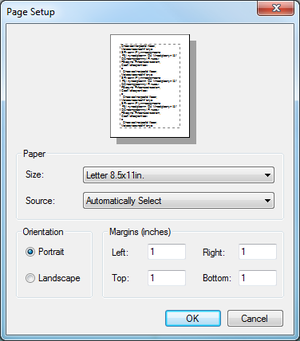
Page Setup: In the page setup menu, the paper size, printer tray, orientation, and margins of the part print out sheets can be defined.
Print: Click the 'Print' option to print out the setup sheet for the current part. To add or remove anything from this page, check/uncheck any of the printing options in the Settings tab in the tabbed section near the upper left corner of the part design frame.
Print Preview: Click the 'Print Preview' option to see a preview of the setup sheet. Use the icons in the top left corner to adjust the zoom and the amount of pages shown. Click the 'Print' button to print the setup sheet. Click 'Close' to close the print preview without printing.
Recent Files: Place the cursor over the 'Recent Files' to see the last 10 files that were opened. To open a file, click the file name. Click 'Clear List' to remove any recent files shown in the list.
Exit: Click the 'Exit' option to completely close out of the software. If any files haven't been saved, a prompt will appear for each unsaved window asking whether to save or not.


