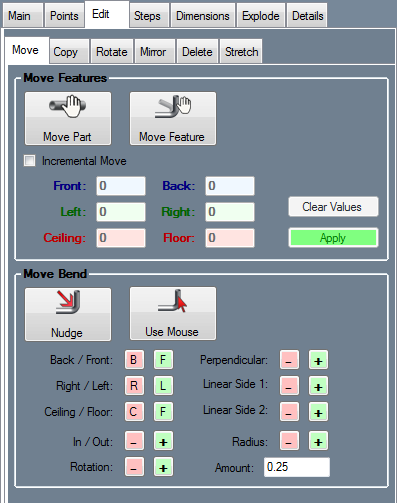
Header - Move
Bend-Tech 7x Wiki :: Header Design :: Edit :: Move
Move Features
Click the Move Part button  to move full parts to new locations.
First, click on a PickPoint of a part. If Incremental Move is not checked, you will be asked to choose which PickPoint will be the anchor point. You will then be able to click any PickPoint to place the part there, with its anchor point centered on the point you select. If Incremental Move is checked, you will only have to click the part you are moving once. You will then be able to enter values into the Front, Back, Left, Right, Ceiling, and Floor fields in order to move the part in that direction by that value. To reset all fields to 0, click the Clear Values button.
To finalize and move the part to the new location, click the Apply button.
Click the Move Feature button  to move single features.
First, click a part and select a feature to move. If Incremental Move is checked, enter values into the Front, Back, Left, Right, Ceiling, and Floor fields and click the Apply button. If Incremental Move is not checked, click a PickPoint to move the feature there. The part will then be adjusted accordingly. See image below for an example of this function.
Move Bend
Click the Nudge Bend button  to push a bend a given amount in a specific direction.
Next, select the bend that will be adjusted. Use the green and pink directional buttons to slightly push the bend in a certain direction. The amount that the bend will be nudged is determined by the value in the Amount field, which can be adjusted by supplying a new amount.
Click the Use Mouse button  to move a bend using the mouse controls.
First, select the bend to move. Next, the move bend tool will be placed upon this bend and can be used by clicking and dragging any of the arrows to pull the bend in a certain direction.


