Header - Main
Bend-Tech 7x Wiki :: Header Design :: Main
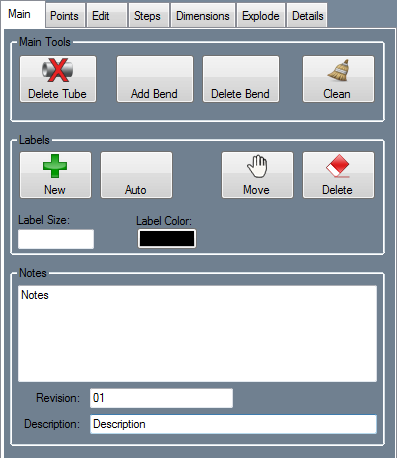
Main Tools
Delete Tube
To delete an entire tube from the header design, first click the Delete Tube button ![]() and click on a tube.
and click on a tube.
Add Bend
To add a bend to a preexisting part, click the Add Bend button ![]() and select a straight length of a part by clicking on it to choose a location for the bend. The bend will be placed at the mid point of the selected part length.
and select a straight length of a part by clicking on it to choose a location for the bend. The bend will be placed at the mid point of the selected part length.
This bend can be edited using the Move tools in the Edit tab.
Delete Bend
To delete a bend, click the Delete Bend button and click on a bend.
Clean
Click the Clean button ![]() to clear the header of any zero length tubes that may be in the header design.
to clear the header of any zero length tubes that may be in the header design.
Labels
New
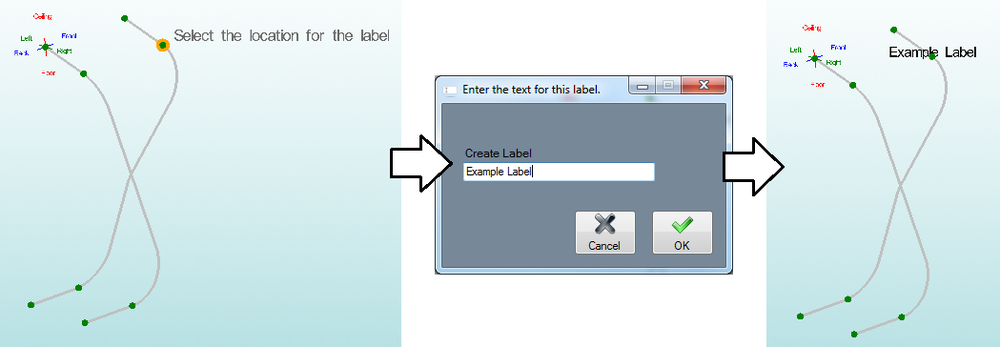
To manually add a label to the header design, click the New button ![]() . Next, click on a point to choose the location for the label. Enter the label text and click OK to place the label.
. Next, click on a point to choose the location for the label. Enter the label text and click OK to place the label.
Auto
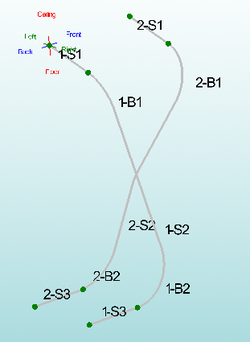
To automatically place labels on the header design, click the Auto button. Labels for each straight and bent section will be placed along each tube. See image below for an example.
Move
To move a label, click the Move button ![]() and select a new PickPoint to place the label in the new location.
and select a new PickPoint to place the label in the new location.
Delete
To delete a label, click the Delete button ![]() and click on a label.
and click on a label.
Label Settings
The size of the label font is determined by the Label Size value (larger values result in larger labels and vice versa). To change the size, enter a new value in this field. The color of the labels is determined by the Label Color button. To change the color, click this button and select a new color.
Notes
To add notes, revision information, and a description to the header design, enter them into the fields provided here.


